Archive | 2008

Corn Tostada Stacks

6 May

With the celebration of 5 de Mayo, I’ve been feeling like I should indulge in some Mexican food.

I bought a stack of white corn tortillas.  This stack is a testament of the size of typical Mexican families, because this will definitely last me for weeks, if not months.  This stack is huge!!!!  I have not counted them, but my guess is it has about 40-50 corn tortillas.  We need to start using them in multiples…

Inspired by a Simply Delicioso show I saw on the Food Network, I decided to create a stack of these tortillas, that when fried, they are magically transformed into Tostadas.

This is what I did…


CORN TOSTADA STACKS

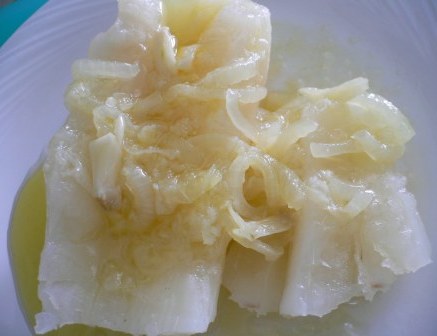
2 white corn tortillas
1 potato, boiled
1 tbs cream cheese
½ onion, sliced
½ green bell pepper, sliced
1 garlic clove, grated
2-3 tbs Mexican salsa
2 lettuce leaves – I used romaine , washed well and sliced thinly
Salt and Pepper to taste
1 tbs canola oil, to fry the tortillas
1 tbs sour cream, to garnish on top


  1. In a small skillet, heat the oil at medium high heat.   When the oil is smoking hot, fry one tortilla at a time.  They’ll take about 2-3 minutes on each side, until the tortilla is slightly golden and crispy.  Drain on a paper towel and sprinkle with salt as they come out of the skillet.
  2. While you’re frying these tortillas, mash the boiled potato with the cream cheese and a bit of salt.  If you find the potato too stiff, add a tab bit of olive oil to soften.  Set aside.
  3. After you’ve finished frying the tortillas, sauté the onions and peppers in the same skillet.  Why dirty another pot?  Add some salt and pepper to season and to soften.  Add the grated garlic clove to season.  When the onion/peppers are soft take them away from the heat and set aside.

Now we assemble…

4.  Place one tostada on the bottom of your plate.  Spread the mashed potato mixture, spoon some salsa, spoon the onions and peppers, sprinkle the shredded lettuce and top off with the tostada you have left.

5.  Spoon some extra salsa on top and garnish with some sour cream…  I did not have any on hand when I did this, so that’s why it’s missing from the picture.  But I know it will add something good and delicious to the mix.


I am sure you can continue adding layers of goodness to this… how about a layer of corn and bean salsa or some fresh tomatoes, or even some saucy stewed soy protein (so it looks like ground beef)…  the possibilities are endless.

¡Viva México Lindo y Querido!

Yucca con Mojo Cubano

4 May

The first Mojo I learned about was this – the Cuban Mojo you eat with yucca or with black beans and rice.  The now famous drink in the diminutive, Mojito, has been an acquired taste in the last few years…  This Cuban Mojo over Yucca is a staple at ANY and EVERY Cuban household, and something my family in Miami always makes for me, especially now that I am vegetarian.

Cuban Mojo is delicious – the best “sauce” to pour over anything.  To me, it’s just glorious.  It’s the only decent accompaniment to eat with boiled yucca.  Once you learn how to make it, I am sure it will find its way pairing a lot more than just yucca.  I am almost sure this mojo is the culprit of why I need to squirt lemon juice on arroz moro (black beans and rice).

Try it today… you’ll be a convert immediately!!!


YUCA CON MOJO CUBANO

1 yucca root, peeled and cut and middle thread removed or a few pieces of frozen yucca
½ cup of extra-virgin olive oil
½ onion, sliced thinly
3 garlic cloves, finely minced or grated
The juice of 1 lime or limón criollo
Salt to taste, for the boiling water and for the mojo
 
  1. In a medium pot with water, add the yucca root pieces and salt and bring to a boil.  Salt the water as if you were boiling pasta.  Water should only barely cover the yucca.  I am lazy, so I buy sometimes the frozen yucca kind.  It works very well and it always turns out soft when boiled.  Yucca can have a tendency to turn out hard; it’s a crap-shoot.  
  2. While the yucca boils away, in a small saucepan over low heat add the olive oil, the onion and the garlic.  Let the onions and garlic soften and simmer slowly in the oil.  Add salt to taste.  I tend to season well, about ½ tbs, but I have to be honest, I do not measure.
  3. When the onions are softened, the garlic is cooked, but none have gotten any color, turn off the heat and add the juice of the lemon.  The oil will cloud a bit, but that’s the measure of a true mojo… lemony tangy goodness with the punch of the garlic and onion… YUMMM!!!
  4. When the yucca is fork tender, drain and serve with spoonfuls of mojo over it.


This is the perfect side dish with any Cuban dish… I particularly like it with black beans and rice.   And that’s an upcoming lesson.

Mediterranean Eggplant Stacks

28 Apr

Has it ever happened to you…  that  when you wish on something hard enough, the answer to your request will come to you automatically.  I am a firm believer in that…

Well, the other day I was feeling so-so, because my fridge was full of little somethings.  To the OCD part of me, that just drives me crazy.  I like order in my universe and that includes a clean, organized fridge.  I had some hummus left, I had eggplants that would start to spoil soon, I had an opened jar of roasted peppers, among others…  so, I sat down to watch my afternoon fix of Food Network and here comes Rachael with this 30-minute recipe for Mediterranean Eggplant Steaks – a vegetarian recipe good enough for meat-eating company…  my kind of recipe!!!

I tried the recipe that same night I learned, in fact, that I missed the olives in the original recipe…  and it turned out great.  I shared it with my neighbors and they were impressed.  They asked me to make this at an upcoming neighborly get-together…  nice, huh?   And if the Israeli neighbor liked it… it must be good, if not authentic.

Try it tonight…


MEDITERRANEAN EGGPLANT STACKS

1 medium eggplant, cut into 4 steaks lengthwise, about 1-inch thick
1 (10-ounce) box frozen spinach, defrosted
1 roasted red pepper, chopped
1 or 2 cloves garlic, grated
1 cup of hummus, home-made or store-bought
1 cup whole-wheat or spelt bread crumbs
2 tbs fresh flat-leaf parsley
Extra-virgin olive oil
Salt and Pepper to taste


  1. Defrost spinach.    Pre-heat oven to 400 degrees F.
  2. Heat a non-stick skillet to medium-high with about 1 tablespoon extra-virgin olive in it.  Add roasted peppers and garlic to skillet.
  3. Squeeze the spinach dry and separate as you add it to the skillet. Season the spinach with salt and pepper and heat through.   Set aside.
  4. Brush the eggplant steaks lightly with extra-virgin olive oil and season liberally on both sides with salt and pepper.  
  5. In the same skillet you made the spinach and peppers, pan roast the eggplants 3 to 4 minutes for small eggplant, turning occasionally, until the steaks begin to become tender but are not fully cooked.
  6. Place the eggplants on baking sheets. Top each steak with a few forkfuls of spinach mixture.
  7. Spread a few rounded spoonfuls of hummus evenly across the steaks on top of the spinach, covering it completely in a thin layer.
  8. Toss the bread crumbs with 2 tablespoons extra-virgin olive oil and parsley. Divide the bread crumbs and scatter them over the steaks on top of the hummus.
  9. Bake for about 5 minutes or so,  to brown bread crumbs.


A note about eggplants:

I learned once from Martha Stewart and a guest on her show, Eleonora Scarpeta, that you should always buy the lightest eggplants you can find.  They should be light for their size – kind of like the opposite you would think, no?  The reason being that the lighter the eggplant, the less seeds it has and therefore the less bitterness it will have.  This fact is particularly important in this recipe where we cut the eggplants and cook it straight.   

Coconut Tembleque

26 Apr

Tembleque is a Puerto Rican dessert, traditionally made mainly during Xmas time.   However, it can be enjoyed year round.  And it’s a special treat when you can taste it outside of Xmas… very unexpected.

The name “tembleque” comes from the verb “temblar” or “to tremble”.  The dessert is a jiggly/trembly custard made with coconut milk, sugar and set with cornstarch.  I added the word coconut in the name for the benefit of those who are unfamiliar to the tembleque dessert.  But, we do not add the word coconut in front; it would be “redundant”, because tembleques are only made with coconut milk… there are no other versions… yet. (This explanation is giving me ideas…)

We decided to make this because so many people in the Center who are avoiding wheat, spelt and dairy products so dessert options need to get more creative each time.  Plus, this would be a good accompaniment to other true Puerto Rican delicacies such as Arroz con Gandules and Alcapurrias.

It’s easy and super delicious…  check it out.


COCONUT TEMBLEQUE

Makes about 24 servings


12 cups of coconut milk
1 ½ cups of brown sugar
6 cinnamon sticks
1 ¼ cup cornstarch, diluted in some reserved coconut milk and ½ cup water
Ground cinnamon, to garnish


  1. In a large pot, pour about 10 cups of coconut milk, sugar, cinnamon sticks and bring to a simmer.
  2. In a small mixing bowl, mix together the remaining coconut milk, the cornstarch and water.  Whisk together well and pour into the simmering coconut milk. 
  3. Whisk in the whole coconut milk mixture until it thickens slightly.
  4. While it still hot, CAREFULLY (because it can burn you – I speak from experience), divide in individual servings, about  1/3 – ½ cup each.  
  5. Garnish with a sprinkle with ground cinnamon on top.
  6. Refrigerate for about 2-3 hours.  Serve cold.

Carrot Cupcakes

24 Apr

It’s Spring, or as we say here in Puerto Rico… Summer’s here!!!!   The heat is blazing already, the humidity is rising and I am in the mood to bake cupcakes.

I learned this recipe from Mr. Alton Brown, one of my culinary teachers from the Food Network.  I love this cupcake recipe because I do not need a mixer.  It’s super easy to make and super reliable.  I always make them to raise funds for the Yoga Center… people can’t get enough of them.  They’re moist, chewy, and taste delicious.  I usually make them without the traditional cream cheese frosting because of all the dairy-free people at the center.  But I will make some with cream cheese frosting and share the recipe with you.

Also, these cupcakes are the 1st recipe I am making for my “catering/baking” business.  I am looking to understand if my next serious career move should be something regarding my cooking and selling these cupcakes are a start…   The picture is from the dry run I did before I actually go out and sell these to people.  I know I still need to make them larger, so I am playing around with quantities… but for your personal enjoyment, the measures in the recipe work very well.


CARROT CUPCAKES

Adapted from an original recipe from Alton Brown
2 ½  cups, whole-wheat or spelt flour
About 5 medium carrots, grated medium
1 tsp baking powder
1 tsp baking soda
¼ tsp ground cinnamon
¼ tsp freshly ground nutmeg
½  tsp salt
1 ½ cup brown sugar, firmly packed
4 ½ tsp egg replacer mixed with 6 tbs of water
6 oz plain yogurt
6 oz vegetable oil
½ cup raisins
½ cup chopped walnuts


  1. Preheat oven to 350 degrees F.
  2. Measure the flour, baking powder, baking soda, spices, and salt in a large mixing bowl and whisk to sift and combine.  Add the carrots to this flour mix and toss until they are well-coated with the flour.
  3. In the bowl of the food processor or in a blender, combine the sugar, egg replacer, vegetable oil and yogurt.   Pour this mixture into the carrot mixture and stir until just combined.   Add the raisins and walnuts and stir one last time to combine.
  4. Line cupcake pan with cupcake liners and pour about ¼ cup batter measure per cupcake.   Bake on the middle rack of the oven for 45 minutes. Reduce the heat to 325 degrees F and bake for another 20 minutes.
  5. Remove the pan from the oven and allow cake to cool 15 minutes in the pan. After 15 minutes, take the cupcakes out of the pan and allow them to cool completely.