Archive | sauces RSS feed for this section

Parsley Dressing

27 Sep

There’s more to curly parsley than just a chain restaurant garnish…  Just like there’s more to my friend Tania than meets the eye.

Perejil y Ajo

This is a recipe I learned from her. Tania is a hair stylist but, every time you go to her salon, you get your hair done and your tummy full. The last time I was there she fed me lunch… and as any typical yogi would do, half the plate she gave me was salad. But this salad was special… it had a special dressing.

Tania tells me this parsley dressing is her go-to salad dressing at home. It’s super easy to make and she always has a bottle of it on top of her kitchen counter. I bragged so much about it to another friend in our running group that Tania had to make a dressing batch just for this other friend to try.

I have been dreaming of making salads with this dressing for a while now… and this is my homage to Tania’s Parsley Dressing. I hope I make it justice. A bottle of this is standing on my kitchen counter as I type!!

??????????

PARSLEY DRESSING

1 bunch of curly parsley, thicker stems removed and coarsely chopped
1 garlic clove
½ tbs kosher salt
½ cup extra-virgin olive oil
¼ cup water

This is the time to take out your immersion blender… I first used my food processor, but just a bunch of parsley is too small to use a large processor. Tania makes it in her Vitamix blender…

  1. In a glass measuring cup measure the olive oil and the water. Add the garlic clove, salt and the coarsely chopped parsley to the large measuring cup. Start pureeing with the immersion blender until the oil emulsifies and turns creamy.
  2. The measuring cup is nice because the spout will help you decant it into a bottle where you can keep the dressing for future use.

The dressing is chunky… but it’s super flavorful. Pour it over a green salad or even boiled potatoes or rice. It’s very, very versatile.

This is a great use of all that curly parsley that goes on sale frequently. I tend to prefer flat-leaf parsley in recipes, but for this preparation, curly works just fine.

Guacamole Verde

1 Jul

You know I am not a cilantro fan… When a recipe calls for cilantro I usually substitute with flat-leaf parsley or I just omit it at all.

But there is something I have learned about cilantro in the last few years… I can tolerate it, even enjoy it, when I use only the leaves and not the stems of the cilantro plant. The stems remind me too much of the taste of recao. It’s too strong for me and gives me acid reflux. I know… not pretty. I noticed this once when I was cooking the now-famous veggie sancocho recipe after a retreat. I did like Ina Garten and shaved the leaves off the stems of the cilantro and used only that to “season” the sancocho. The other “more experienced” cooks were appalled at my “waste” of perfectly good cilantro stems. But many of the soup eaters thanked me afterwards because the cilantro flavor was subtle and not over powering at all after a few days of fasting.

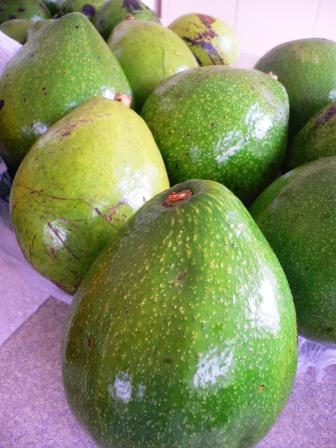
Fast forward to the other day when I wanted to make something to bring to a party and I had an over abundance of avocados in my hands. I decided to make an avocado without tomatoes so it would stay as creamy as possible without the watery residue tomatoes sometimes leave atop guacamole. At the store there was no flat-leaf parsley so I went with the traditional and very much cheaper cilantro.

This guacamole was an absolute hit… People were asking me for the recipe all night. I wished I had posted this recipe already so I would not have to repeat myself so many times that night.

Guacamole Verde

GUACAMOLE VERDE

1 large avocado, cut into small pieces
1/2 medium onion, finely diced
The juice of 1 green lime
A generous handful of fresh cilantro leaves, chopped
A drizzle of olive oil – about 1 tbs
Salt and Pepper to taste
  1. Mash everything together in a medium sized bowl.
  2. Let it stand in the fridge for a few hours so the flavors meld together.

You can make this with fresh avocados, but it also works with frozen avocados. Just defrost them and get rid of any water that separates from the pulp when the avocado is thawing.

Make your own mustard!!!

17 Apr

Have you made your own mustard? Ever? I hadn’t until now…

It’s super easy. All you really need is time and a blender. Oh, and mustard seeds. I bought mine at The Spice and Tea Exchange store in Boca Raton. I have not seen mustard seeds sold here in Puerto Rico, so out of curiosity I bought an ounce of mixed yellow and brown mustard seeds. Together they measured about ¼ cup.

Here’s how I made it…

??????????

WHOLE GRAIN DIJON MUSTARD

1/8 cup yellow mustard seeds
1/8 cup brown mustard seeds
¼ cup apple cider vinegar
¼ tsp salt
1 tsp brown sugar
  1. Place the mustard seeds and vinegar in a small bowl with a tight lid. Let them soak at room temperature for 2 days.

Grain Mustard Soaking 2

??????????

2.  After 2 days, I transferred the seeds and liquid to my Magic Bullet. Add salt and sugar. Puree until a mustard paste is forms but you can still see whole seeds. Transfer to an airtight container and let it rest for 2 days before using.

I rested this for over 2 days in the fridge and the taste is SHARP!!! But I do enjoy very sharp flavors… in my cheese and my mustard. But I was told by a friend that if you leave it out at room temperature for a few days and then refrigerate it, that the taste will be much mellower. The cold from the fridge stops the mellowing process. So that something to think about.

This is the perfect mustard to dress your favorite sandwich or even to roast some potatoes in. It’s sharp, spicy and very easy to make.

Have you made your own mustard?? Tell me all about it…

Chopped Avocado Salad Dressing

20 Aug

My grandpa instilled in us a love for avocados… to him, a salad with dinner would mean slicing a few “rajas” of avocado on the side. His favorite was rice and corn with ketchup and avocado. I know it sounds “kookie”, but you need to try it.

But the love for avocados comes from both sides of the family because once, while visiting my aunt and uncle in Miami, I had to buy a new suitcase to be able to travel with the 5 huge avocados my uncle bought for me to bring back home.

And as much as we love avocados, we don’t have a lot of family recipes using avocados. We just love them so; we do not see them as an ingredient in a recipe. They’re the exclamation point to any dish they’re added to!!! A few slices or wedges of avocado on the side of anything make the meal better. A soup??? Drop a few pieces of avocado inside to make it sing… A sandwich?? Slice a few avocados to make it creamier…

Lately I am training for a ½ marathon and I am trying to eat better and leaner. I am eating more salads, which I like, but I am particularly lazy to make them at home often. I’ve found the best way to fall in love with a salad is to make a killer dressing. Fall in love with a dressing and you’ll fall in love with the salad underneath.

And because I want you to love avocados as much as I do… I want to present to you a very easy avocado based dressing that’s much a dressing as a salsa to brighten other dishes too.

CHOPPED AVOCADO SALAD DRESSING

½ large avocado, cut into little pieces
1 small tomato, diced finely
½ small white onion, diced finely
½ cup Extra Virgin Olive oil
2 tbs Rice Vinegar
The juice of 1 small lime
½ tbs kosher salt
1 tsp freshly cracked black pepper
  1. Combine all ingredients in a medium bowl and allow the mixture to meld and combine a few minutes before serving over your favorite salad.

Because the dressing includes avocados, tomatoes and onions, it’s great for a simple lettuce-only salad. You don’t need anything else IMHO. But this dressing also works as a topping for tacos, for burritos, for enchiladas… or as a sauce in sandwiches.

If you want more recipes using Avocados from Mexico, visit this link here. And if you live in the US, check out the coupons for Avocados clicking  right here.

Dulce de Leche

25 Jun

Argentineans, Paraguayans, even Brazilians love their dulce de leche… I know because I just came from a trip in which I almost ate dulce de leche on a daily basis. And the dulce de leche I am talking about is the dulce de leche known in México as cajeta, made from cooked and reduced sweetened milk. Sometimes it’s made from cow’s milk, sometimes from goat’s milk, but every time it’s exquisitely delicious.

There are aisles full of different brands of dulce de leche at every store we visited in Argentina, Paraguay or Brazil. The most popular brands in Paraguay, which is where we stayed the longest, are Trebol and Lactolanda. With their factory very close to Coronel Oviedo, Lactolanda was certainly the most popular brand we ate throughout our trip.

We ate dulce de leche with everything…. On its own, over crackers, with passion fruit mousse… even with queso paraguay. When I am on a trip, I forget about watching my weight and I ate dulce de leche to my heart’s content.

But when I am at home, it’s a different story… My mom once bought a tub of Lactolanda from one of her earlier trips that sat on my kitchen counter for almost 2 years. I am a dulce de leche lover, but I can see the dulce de leche on my kitchen counter and not be hypnotized by it until I finish it all.

But once I a while I do like my sweet fix… Once in a while I crave dulce de leche with a passion. And what do you do when you get a craving and you don’t have a tub of Lactolanda’s dulce de leche waiting in your counter??? You make it yourself…

DULCE DE LECHE

1 can of sweetened condensed milk

Yep… one ingredient.

  1. All you need to do is fill a pot with water and place the can of condensed milk inside. Make sure the water covers the can completely. Cover the pot and bring the water to a rolling boil.

2.  Once the water boils aggressively, you can lower the heat to medium-low with cover still on to keep it boiling but to avoid the water from evaporating all away. Let it boil for 1 hour.

3.  After one hour of boiling, carefully flip the can upside down to allow the other side to milk inside to cook evenly. If the water has evaporated that the top of the can is not submerged, add some additional water to the pot. Leave it covered so it starts boiling again fast. Let it boil for another hour.

4.  After the second hour has passed. Turn the heat off the stove and leave the can in the water with the pot uncovered.

5.  Allow the water to cool off a bit for about 1 extra hour. Carefully, take the can out of the hot water and allow it to cool off some more for about an extra hour or so.

I advise you not to open the can immediately because the condensed milk inside that now is converted to dulce de leche is EXTREMELY HOT and you can certainly burn yourself when the pressure and steam created inside the can shoots out the moment you open the can. It oozes super hot like lava and you don’t want a sugar burn…

After you feel the can is cool enough to handle… open it with a can opener and serve as you please. Some ideas are:

As a dipping sauce for crispas…

Inside a crepe…

Over toast or cookies…

Over ice cream…

Or just take a spoon and eat away… and to be honest, who needs a spoon when you have hands, right???