Archive | side dishes RSS feed for this section

Plantain Tostones

20 Jul

I had already given you a lesson in making tostones when I shared my Tostón Sandwich with all of you.  This time, I want to show those of you who are not familiar with tostones – the traditional way of making them… well, almost traditional because like most of you outside the Latin communities, I do not own a “tostonera” – the implement used to mash the tostones into its traditional shape.  Funny I do not own one, because my dad sells them wholesale.  As they say in Spanish, “en casa del herrero, cuchillo de palo”.

I specify these are Plantain Tostones because tostones can be made from the traditional plantains, or also out of breadfruit.  Tostones (any kind) are a great side dish to many dishes I have shared with you here…   like pastas, rices or even to use as a base for a delicious Antipasto

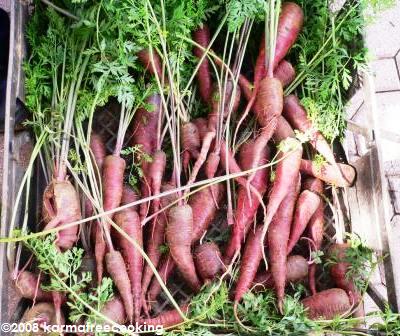
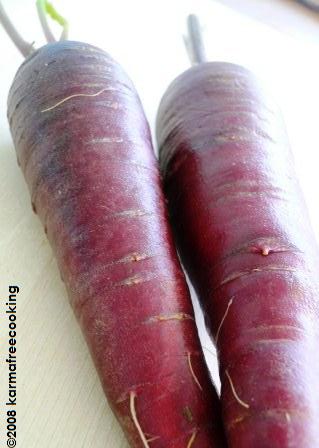
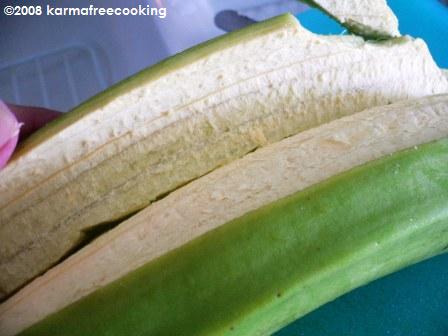
Here’s how… you need to start with Green Plantains.  Optimally, they need to be large, but very green still.   Here is a picture to give you an idea of the differences in ripeness.


PLANTAIN TOSTONES

1 green plantain, peeled and sliced in 1-inch rounds
Canola oil, for frying
Garlic Salt for sprinkling on top after they’re fried
  1. In a small skillet, pour about ½ inch of canola oil over medium-high heat.  Check if the oil is ready by inserting the back end of a wooden spoon.  When bubbles form around the spoon, the oil is ready to fry.
  2. This is how you peel a green plantain… chop off the ends.  Make 3-4 slits from top to bottom ends and with the help of a knife and your finger, take the peel off.  Just like with green bananas, if the plantain is too green, the peel will be difficult to take out and refrigeration will not help.
  3. When the plantain is peeled, cut it into rounds about 1 inch thick.
  4. Place about 3-4 plantain pieces in the oil and start cooking.  Do not be tempted to place all plantain pieces in even if they fit… why? Because you need to cook them partially, smash them and then refry them.  If you fry them too much the first time, they might be hard to smash.  You do not want to over-fry them that first time, so the easiest way is to work in small batches.  If you have someone helping you in the kitchen, you might be able to get adventurous enough to put in a few extra…
  5. Take 2 plates, a salad plate and a dinner plate.  Place a plantain piece on the dinner plate and with the bottom side of the salad plate SMASH the plantain piece down.  Peel the tostón piece off with a spatula (it probably stuck to either the bottom of the top plate) to prevent it from breaking apart and return it to the frying oil.  Repeat with all plantain pieces.
  6.                       
  7. At this point… you can either store them in freezer bags and freeze them until you’re ready to eat them or finish them to eat immediately by frying them for the second and last time. 
  8. Fry the tostones until they’re golden brown and crispy.
  9. Take them out of the oil onto a plate lined with a paper towel to catch the oil drippings.  Sprinkle with garlic salt as soon as they come out of the oil.


You can also eat them with some butter on top – that’s how my dad likes them…

Roasted Red Carrots

14 Jul

Every other Sunday morning, we have an organic market in San Juan… it’s at Placita de Roosevelt in Hato Rey.  Two Sundays ago I went for the first time.  I’ve never been there before because I always remember too late or I am usually at the yoga center on Sunday mornings.  I decided that after our 4th of July retreat I should go and buy organic fruits and veggies to start my eating rituals again. So off to the organic market we went…

I was a bit disappointed because I was expecting more stands with more variety of goods.  Maybe it was because of the long weekend… and organic farmers need their long weekend vacations too, who knows?!  But I was also pleasantly surprised by some of the things I saw, among them these beautiful red carrots.  These are very unusual, at least for regular Puerto Rican grocery shoppers.


I decided to buy a bunch and experiment… this was the result.

ROASTED RED CARROTS

2 red carrots, scrubbed well and cut into large chunks
Olive oil
Kosher salt and pepper to taste


  1. Pre-heat oven to 400° F.
  2. Place carrot pieces in a baking sheet lined with parchment paper.  Drizzle them with olive oil and sprinkle liberally with salt and pepper.
  3. Roast in oven for about 30-40 minutes, until the carrots are crispy and caramelized.


Serve them as a side dish with roasted potatoes mixed in as well.  Delicious.


Something curious was that when I peeled the carrots (I did because they were soooooo dirty with mud) I noticed they are orange inside.  Not exactly the same as regular carrots, because they have reddish speckles… but orange inside.  I thought they would be red, like a beet, inside.

Cracked Potatoes

27 Jun

Going to my French classes every day this Summer, has made me crave some French-inspired food…  such is the case with these Cracked Potatoes.  I had seen them in magazines, as part of the Gourmet Next Door show and even in several websites…  so I decided they were easy enough for me to give them a try for lunch.

The cool thing is that these look spectacular for company, but with the addition of fresh lemon or lime juice, they tasted fancier than just your regular boiled and “sort of” fried potato… 


CRACKED POTATOES

10-12 baby red potatoes, scrubbed well and left whole
2-3 garlic cloves, smashed open
2-3 tbs olive oil
Kosher salt – generous for the boiling water and more for seasoning later
2 tbs fresh parsley for finishing
The juice of 1 lemon or lime


  1. In a medium sauce pan, boil the potatoes in salted water for about 10-15 minutes.  I try to make them until they’re almost done when pricked with a fork.
  2. When the potatoes are almost done, drain them and let them cool off a little.
  3. Using something flat, like a plate or the underside of a glass bowl (so you can see what’s happening underneath), press each potato slightly until it cracks, exposing some of its flesh.  Be gentle as to not smash the potato completely… you only need a crack.
  4. In a skillet or even in the same pan you used to boil them – just remember that when the potatoes are smashed, they’ll take up more space than previously.   Heat of about 2 tbs of olive oil. Add the garlic cloves that you have just cracked open with the side of your knife.  This will impart a garlic taste to the oil and eventually roast them making them very sweet indeed.   Place the potatoes in the pan and “fry” the potatoes on both sides until the skins look crisp and golden around the edges. 
  5. Try not to add any potato that was over smashed, because this would just fry the insides of that potato and create a nice little mess on the bottom of your pan.  Can you tell I speak from experience????
  6. Right before the potatoes are done, sprinkle with the fresh parsley and toss to combine.
  7. Remove from pan and allow to cool of a little bit.  Sprinkle with a light dusting of kosher salt… and I guess if you have some sea salt or even fleur de sel would make it super French indeed.


When you serve them, allow a lemon half for each guest to squirt some lemon juice on top of the potatoes.   This recipe serves 2 or one hungry Madelyn… Mmmmm.


Stewed Peas

23 Jun

Beans and peas are an acquired taste to me…  and it’s kind of weird because now that I am vegetarian I’ve had to learn to eat these to integrate some variety into my diet.  I would eat some petit pois as part of a paella or an arroz con pollo in my former non-vegetarian life, but I would never eat peas or beans over rice, for example, something that is sooooooo Latin. 

One of the best surprises is sweet peas.  I really like them now.  They are super sweet and delicious.   So the other day I was looking to repurpose a Mexican Salsa I had made which tasted me too much like a sofrito.  And I found that stewing some sweet peas in it was a great way to reuse the salsa and gave the peas the right amount of sauce to moisten the brown rice.  Add some sweet baked plantains (plátanos maduros) and you’re all set.


STEWED PEAS

1/2 cup Mexican Salsa – try this recipe, because I am not sure how this would turn out if you use Salsa from a jar
3/4 cup frozen sweet peas
1 tbs olive oil
Kosher salt, to re-season if necessary


  1. In a medium saucepan, heat olive oil over medium heat and add the salsa.  Cook until you start seeing the tomatoes and onions start of get soft and translucent.
  2. Add the frozen peas.  No need to thaw them at all.  The heat from the pan will do it for you.
  3. Cook for about 10 minutes until the peas get a really pretty bright green color and the sauce looks cooked.


Serve over rice or use as a filling for a pastelón or lasagna…  I also have added some toasted almonds for the added protein and it tasted awesome.  Trust me…

Tomato Salad

17 Jun

This is sooooooo simple, that I don’t really know it if warrants a post of its own…

This is one of my go-to “salads” of all time.  When I was growing up, to slice a few tomatoes and serve it on the side was a perfectly good “salad” in my mom’s opinion.  Quick, simple and no need to dirty a salad plate for it…

Nowadays, I embellish it a bit with the drizzle of olive oil and the addition of salt to season.  And because there’s hardly any ingredients in this, the quality of the tomatoes will dictate how good this salad will turn out.  I prefer using sweet beautiful grape tomatoes.  But lately, my aunt is bringing us organic heirloom tomatoes her neighbor is growing and they’re absolutely fabulous.  Please use organic tomatoes if you can find them near you…

I have this Tomato Salad all the time to accompany pasta, rice and particularly loved it as a garnish for the Florentine Mac & Cheese, but it was more than just a garnish, it was the perfect flavor complement….


TOMATO SALAD

10-12 grape tomatoes, washed well with a veggie rinse and sliced in half
About 1 tbs of olive oil
3 dashes of kosher salt


  1. Mix together well to combine.  Let it sit for 5-10 minutes to allow the flavors to marry.


Can this be any simpler???

Serve as a side dish or on top of your favorite pasta or rice dish.  Here it is as a side dish for our Blue Cheese Polenta and Roasted Mushrooms.