Archive | treats RSS feed for this section

Passion-Fruit Yogurt

6 Dec

I like yogurt… but I no longer buy fruit-flavored yogurts because most of them are made with gelatin.  Only a few brands out there make fruit-flavored yogurts without gelatin.  We can talk about those brands later on…

So for years now, I mostly buy plain or vanilla-flavored yogurt.  I have grown to love eating the yogurt plain like that.  I love it in creamy dips, smoothies or just with a drizzle of honey or agave nectar.  But every once in a while, I like a fruit-flavored yogurt… that’s how I started making these…

Usually fruit-flavored yogurts come already mixed or with the fruit at the bottom. My version has the fruit on top…


PASSION-FRUIT YOGURT

½ cup of plain or vanilla yogurt
The pulp of 1 passion fruit
1 tbs agave nectar or honey
  1. Just mix the ingredients in a small demitasse… mix together well and enjoy.

The seeds of the passion fruit will give a nice crunch to the treat.  I enjoy this as a breakfast, as a treat, as a dessert.

Don’t the seeds look awesome on top of the yogurt???

Passion-Fruit Yogurt on Foodista

Organic Lollipops

8 Nov

I have a sweet tooth… and for Halloween all I was craving were there lollipops from Yummy Earth.


Paletas

I tasted them first when my mom received them as a gift for her birthday.  They are not easy to find here in Puerto Rico, but you can indeed find them.  They’re not only delicious, but they’re also ORGANIC.

The bag comes in 4 flavor varieties…  my favorite are Pomegranate Pucker and Mango Tango.

 Try them soon and let me know what you and your kids think, OK?

Stuffed Baked Brie

18 Mar

The other night we got together to watch the French film La faute à Fidel…  a very nice film showed in a French film festival recently at the University of Puerto Rico.  I was not able to attend the original showing, so my friend Laura’s mother, who’s a film buff and loves to buy films, lent it to us for a night of French movies and of course, French food…

I’ve been meaning to make a different version of the Camembert Chaud at the Bistro de Paris restaurant we love so much… where they take a round of camembert cheese, take the top off and warm it up in the oven and serve with French bread toasts, walnuts and sour apples.

I wanted to see if I could challenge myself and work with some phyllo dough I had bought and was always afraid of using.  I always do that, I like things at the market, but then leave them in the fridge or the pantry and do not use them immediately.   I built myself some courage and this is what turned out…


 brie-relleno-1

STUFFED BAKED BRIE

A 4.5 ounce round of Brie cheese
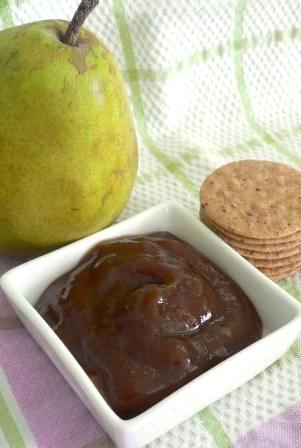
2 tbs of guava jelly
1 ½ tbs toasted walnuts, cut into small pieces
2 tbs caramelized onions – recipe here
4 sheets of whole-wheat phyllo dough – defrosted
4 tbs of butter, melted
Canola spray


  1. Take a baking sheet and line with parchment paper.  Spray with canola oil.
  2. Take one piece of the phyllo dough and place on top of baking sheet.  Brush lightly but evenly with melted butter using a pastry brush.  Place the second sheet of phyllo crosswise, perpendicular to the first sheet.  Brush again with the melted butter.  Place the third sheet of phyllo diagonal to the frist two, as if covering the spaces left open by the first “cross”.  Brush again with melted butter and place the fourth and last phyllo sheet perpendicular to the 3rd sheet, therefore creating another cross with the sheets.  Spread  the last sheet with the remaining butter.
  3. Cut the brie cheese into two halves, creating a top and a bottom half.  We’ll be making a “sandwich” using the two brie halves.
  4. brie-relleno-por-dentro
  5. Place the bottom half of the cheese in the middle or the phyllo sheet stack.  Spread the caramelized onions on on top of the brie half.  Now, spread the guava jelly on top of the onions.  Place the walnuts pieces on top of the guava jelly. And now top everything off with the remaining half of brie cheese.  It may get a bit messy, but it’s all good.
  6. brie-relleno-antes-de-cerrar
  7. Now you’ll start wrapping the brie with the phyllo… take one section and fold it over the cheese.  Now try enveloping the cheese with another side… you’ll see you’ll have a lot of phyllo left over that you won’t know what to do with it.  Just take it all and gather it on top of the cheese like making a bun…  I just could not take pictures of this because my hands were so messy with melted butter.
  8. Place the stuffed brie in the fridge for about 30 minutes to set a bit… 
  9. After 15 minutes have passed, pre-heat the oven to 450 F.  When the oven is ready, bake the brie covered with a piece of parchment with a foil paper on top for about 10 minutes.  Then take off the parchment/foil covering and let the phyllo get golden brown.
  10. Take out of the oven and wait about 2-3 minutes for the cheese inside to adjust to the temperature and cut and serve immediately after.  We served them with water crackers and apple slices.


brie-relleno-2

We loved the mixture of the tangy brie with the sweet guava jelly and onions.  But I had a few mishaps and I want you to learn from my mistakes.  So here are some tips when making this Stuffed Brie:

  • Use the same baking sheet where you’ll bake the brie to set it up.  I transferred the brie from that baking sheet to something smaller to put it in the fridge and I almost lost the entire bottom when transferring it back to the baking sheet to bake.
  • The temperature of the oven is important… if the temperature is not that high, your phyllo dough takes longer to cook and get golden and might give your jelly an opportunity to seep out. 
  • This is not a good dish to assemble at home and transfer somewhere else to bake…  I suggest you assemble and bake in the same premises.  I have not tried yet the bake first and then transfer and reheat… if you do, let me know if it works better.


Hope you love it as much as we did…

Ode to the Tropical Cream Supreme

24 Jul

When I was in high school, there was an Orange Julius in Isla Verde…  we would go every Sunday afternoon, after going to the beach the whole day, to cool off with a Tropical Cream Supreme.  This was THE BEST drink over at the Orange Julius.  It tasted like summer, sand and sun all rolled up into a delicious shake.   

I liked these shakes so much that my then boyfriend would buy and bring them to me almost every night when I was home-bound with the chicken pox.  I even bought once a Hawaiian Tropic suntan oil because it smelled just like a Tropical Cream Supreme.  It was almost an obsession… I know.

But that was then…  and suddenly, without even looking for it, I once again reunited with one of my high school loves – The Tropical Cream Supreme.  Let me show you how…


ODE TO THE TROPICAL CREAM SUPREME

1 banana
3 strawberries
1 cup orange juice
½ cup plain soymilk
3 tbs agave nectar
1 tbs bee pollen
3 ice cubes
 
  1. Mix everything in a blender and enjoy it watching the sunset after a hot day at the beach. (sigh!)


The bee pollen is something I added on my own.  It was not included in the original shake, however it added certain sweetness and energy-boosting qualities very much in tune with my current lifestyle.  Try it… it’s available at most natural food stores.

Pear Spread

3 Apr

Pears have been on sale for the longest time every time I visit the grocery store.  So I decided to buy some the other day to make my roasted pears for the French Dinner.  I love these roasted pears, but it was time for some diversity…  so I decided to make butter – Pear Butter.

I am not going to question how the name came to be… especially after my previous post about a punch called a “bull”.  If I were to name this in Spanish it would probably be something like “Compota de Peras” or Pear Compote.  However, I believe the name Pear Spread is truer to the final application.

Here’s how I made it…


PEAR SPREAD

2 ripe Bartlet Pears, peeled, cored and cut into 1-inch pieces
½ cup water
2 tbs white balsamic vinegar
2 tbs freshly squeezed lemon juice
 
¾ cup brown sugar
1 tsp vanilla powder
1 cinnamon stick
Pinch of salt


  1. Combine pears, water, vinegar and lemon juice in a medium heavy saucepan.  Cover and simmer until pears are soft, stirring occasionally, about 20-25 minutes.
  2. Puree the mixture using a hand blender or in a food processor.  If using the food processor, be careful transferring the mixture to the food processor and back into the saucepan again, because the liquid is very hot.
  3. Add the sugar, vanilla, cinnamon and salt to the pureed mixture.  Stir over low heat until the sugar dissolves.
  4. Increase the heat to medium and boil gently uncovered until mixture reduces and thickens, about 1 hour.  Stir occasionally to prevent any scorching in the bottom.
  5. Discard the cinnamon stick.  Spoon the spread into canning jars if canning.  I do not know how to do that, so I just waited for the mixture to cool down some and transferred to a plastic container and ate it all within a week.