French Quesadilla

31 Aug

You know me… the Puerto Rican girl with a French fixation. 

After my French get-together, I had a lot of left-overs from the party.. . Gruyere cheese, lots of onions, bread…  I think I thought I was going to cook soup for a French Army or Navy 😉  So, I had to get creative in how I used up all of that without boring myself and that’s how the French Quesadilla came about.

This comes together really fast and has a nice flavor to it.  Perfect for a lunch or simple supper, it can even impress a date.


FRENCH QUESADILLA

1 whole-wheat flour tortilla
2 tbs caramelized onions – I’ll show you how to caramelize them, but you don’t need the whole batch for this – recipe follows
1 tbs sun-dried tomato jam
3 ounces of gruyere cheese, shredded
Canola oil spray


  1. In a large skillet sprayed with canola oil over medium- high heat, place the flour tortilla and heat up a bit, for about a minute.
  2. Place half of the cheese on the tortilla.  Fill half the tortilla with the onions and the other half with the sun-dried tomato jam.  Sprinkle the remaining cheese on top.  Fold the tortilla, so you know have a ½ moon.
  3. Let the cheese melt on one side for about 2-3 minutes, then flip the quesadilla so the cheese on the over side can melt evenly too.


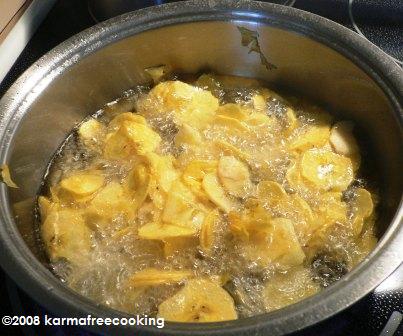
To caramelize onions:

1 medium onion, sliced thin
2 tbs butter
Drizzle olive oil
1 1/2 tbs white wine vinegar with tarragon
Salt and Pepper
  1. Follow the same procedure you might have used if you made my French Onion Soup.
  2. In a heavy-bottomed pot, melt the butter with the drizzle of olive oil over medium heat. 
  3. Place the onions and stir to make sure they’re all covered.  Let the onions get soft for about 6-7 minutes, stirring them occasionally. 
  4. Lower the heat a bit and cover the pot.  Let them cook over low heat for about 30 minutes.  Stir them occasionally. 
  5. Almost at the end of the 30 minutes, add the salt, pepper and vinegar.  The vinegar will help you scrape anything that might have stuck to the bottom of the pan with a wooden spoon. 

Allow to cool off and use in your favorite recipe…

How to Peel and Eat a Mango

29 Aug

I’ve seen the chefs at the Food Network do it… I’ve seen contraptions at Williams-Sonoma to help people separate their flesh from the pit.  And still I do not understand why people are so confused or baffled about the way to peel a mango.

To peel and eat a mango raw, as a fruit, all you need is a nice serrated knife.  Huh…  maybe a napkin too, because if the mango is juicy and delicious I can bet that some juice will run down your arm and the sides of your mouth.  But besides that, no other implement needs to be used or dirtied to peel and eat a mango.


This is a photo of a mango from my godfather’s tree in Miami… isn’t it beautiful???  Whenever I go to Miami, my uncle Felo always makes us eat and bring with us on the plane a mangoes and a avocados.  Once, I had to buy a new suitcase so I could carry the small farmer’s market he wanted me to bring along.

Back to our mango peeling class… this method was taught to me by my Puerto Rican grandma, Marianita.  Funny thing, that she taught the grandkids and not her daughters, because when I told my mom about writing this post, she was in the dark as many of you may be now.  I am amazed that my mom had never seen me eat a mango like this… I think she needs some gingko biloba to jig her memory STAT!!!!


 PEELING AND EATING A MANGO

What we will do is to peel the mango skin so you will end up first with a peeled top 2/3 of mango, keeping the skin on the bottom 1/3 so you have something to hold on to. Then, you will turn the mango upside down, peel the remaining skin and use the pit to hold on to the remaining mango, kind of like a popsicle.

All you need to do is three cuts with a serrated knife. 

Take the mango in one hand upright.  The stem end facing towards you.

You’ll make one cut across the mango, towards the bottom third.  All the way around the mango, but only through the skin, no need to go any deeper. 


Now the next cut goes from the cut you already made going up from one side of the mango continuing in one single swoop all the way to the cut on the other side of the mango.  Now repeat in a cross like fashion.  You must have ended up with a mango that still has the skin on but with 4 sections of cut skin on top. 


Take one corner of the skin and pull it to peel.  The whole peel will remove leaving you with a nice edible mango with the bottom still with skin so you can hold on to it and not be slippery.


When you’re done eating that side of the mango, just turn it upside down.  Hold the pit in your hand and pull the rest of the peel to expose the remaining mango flesh.


Eat the remaining mango and discard the pit once you’re done.


Number of utensils you need dirty – 1

Number of cuts made to the mango – 3

Experience eating a sweet mango with your hands and having the juice dribble down your chin – priceless!!!

Mango Lassi

18 Aug

When my mom turned vegetarian, one of the ways she maneuvered into getting me to like vegetarian cooking was to encourage me to take vegetarian cooking classes.   I never disliked cooking, yet it was something done in my house to appease your hunger, not something we had a passion for.

I learned to make whole grain rice, textured soy protein, some sort of potato pastelón, a basic cake recipe without using eggs and as a beverage I remember extra clearly, Mango Lassi.  I remember expressly because I had never mixed mango with yogurt before and it tasted DIVINE!!! 

Maybe the divine part was because Lassi comes from India – the land of deities and divinity.  It’s traditionally made with mangoes, which are plentiful in India, but it can certainly be made with any other fruit.  Lassi is nothing more than a fruit shake made with yogurt and ice.  I read there are versions with rosewater, pistachios, and other spices.  The funny thing is that I went to India 4 years ago;  I never had a lassi – plenty of mango juice, but no lassi.

My version of lassi is simple and very refreshing.  What I like about lassis is they’re great to prepare the digestive system to receive food.  It very well is the active cultures in the yogurt, or that it’s a way to consume fruits BEFORE food instead of as a dessert.  But no matter the reason, they’re just delicious any time of day, particularly in the summer heat.


MANGO LASSI

1 mango, peeled and diced
1 cup of plain yogurt
2 tbs agave nectar
3-4 ice cubes
¼ cup of water, to thin out the mixture if it’s too thick for the blender to process


  1. Mix all the ingredients in a blender.  Blend it at the highest speed for about 1-2 minutes to make sure the mango fibers are broken very well.


Enjoy as an appetizer, as a snack or as a great breakfast shake.

Spinach and Tomato Roll Call

16 Aug

I love spinach and I love tomatoes.  How many ways can I incorporate these two into a delicious meal?? Let me show you the ways:


No Boil-Ahead Pasta – Spinach and Tomato Version


Florentine Mac & Cheese with Tomato Salad

Baby Spinach and Potato Pastelón


Spinach and Asparagus Casserole


Spinach, Tomato and 5 cheese Risotto

Vegetable Noodle Soup


Bucatini with Spinach, Tomatoes and Goat Cheese


Eggless Frittatas


Artichoke and Spinach Casserole


Spinach Fettuccini with Marinated Tomatoes


This is it… for now.  Hope you enjoy them time and time again.

Chicharritas de Plátano

15 Aug

While I was in Miami, I got the opportunity to make a true Latin specialty – Chicharritas de Plátano.  This is the way I call them when I am in Miami, because in Puerto Rico these are called Platanutres.  They’re exactly the same, people just call them differently, the same way some people say elevator and others say lift… you get my drift.

But not only these are called differently by Cubans and Puerto Ricans, they’re eaten somewhat differently too.  Puerto Ricans eat platanutres mainly as a snack or maybe even as a side to sandwiches.  However, Cubans eat these little fried slices of plantain as an appetizer, a snack or sometimes even as a crispy side dish to accompany rice and black beans.  Also, they like to serve these with a drizzle of mojito criollo, just like the one I showed you to eat with your boiled yucca, without the onions – just olive oil, garlic , salt and lemon juice.  This is my favorite appetizer in any Cuban restaurant in Miami… and Cuban restaurants in Puerto Rico do not have them.  It’s a Miami thing and I LOOOOOOOOVE it!!

You can get chicharritas bagged, just like potato chips.  I have even talked to you about them in our posts on Junk Food, but the freshly made ones are special.   My aunt Gladys, being the “alcahueta” she is, made me some chicharritas before us leaving Miami.  I wanted to go to a restaurant, but she insisted and I took pictures. 


CHICHARRITAS DE PLÁTANO

2 green plantains
Kosher salt
Canola oil to fry them in


  1. Start by peeling the plantain.  Remember to peel them carefully using an oiled knife to avoid staining your knife.
  2. Slice the plantain very thinly using a slicer or a mandoline.  My aunt uses this nifty slicer.  You can slice it in small rounds, which is the traditional way and the way we did them this time around.  In restaurants you usually see the chips sliced the long side of the plantain.  The choice is yours.
  3. Separate and salt the plantain slices.  I always thought the salt was added after frying, but in fact, I like the taste when they’re salted beforehand.
  4. Bring about an inch of oil to frying temperature in a medium sized pot – about 350° F.  To tell you the truth, I never take the oil’s temperature.  Use the wooden spoon method if you want to be sure.
  5. Drop the plantain slices in small batches and try to separate them as much as possible.  Slices will want to stick together. So try to keep the separate.  Fry them until they’re golden.  Keep an eye on them because they go from perfect to burn easily.
  6. Take them out with a slotted spoon and drain in a paper towel.


Enjoy alone, with mojito criollo or as a side dish – I ate them with black beans and rice and slices of avocado on the side.  I love my aunt’s cooking!!!!!