Tag Archives: food

Pumpkin Chia Kisses

10 Nov

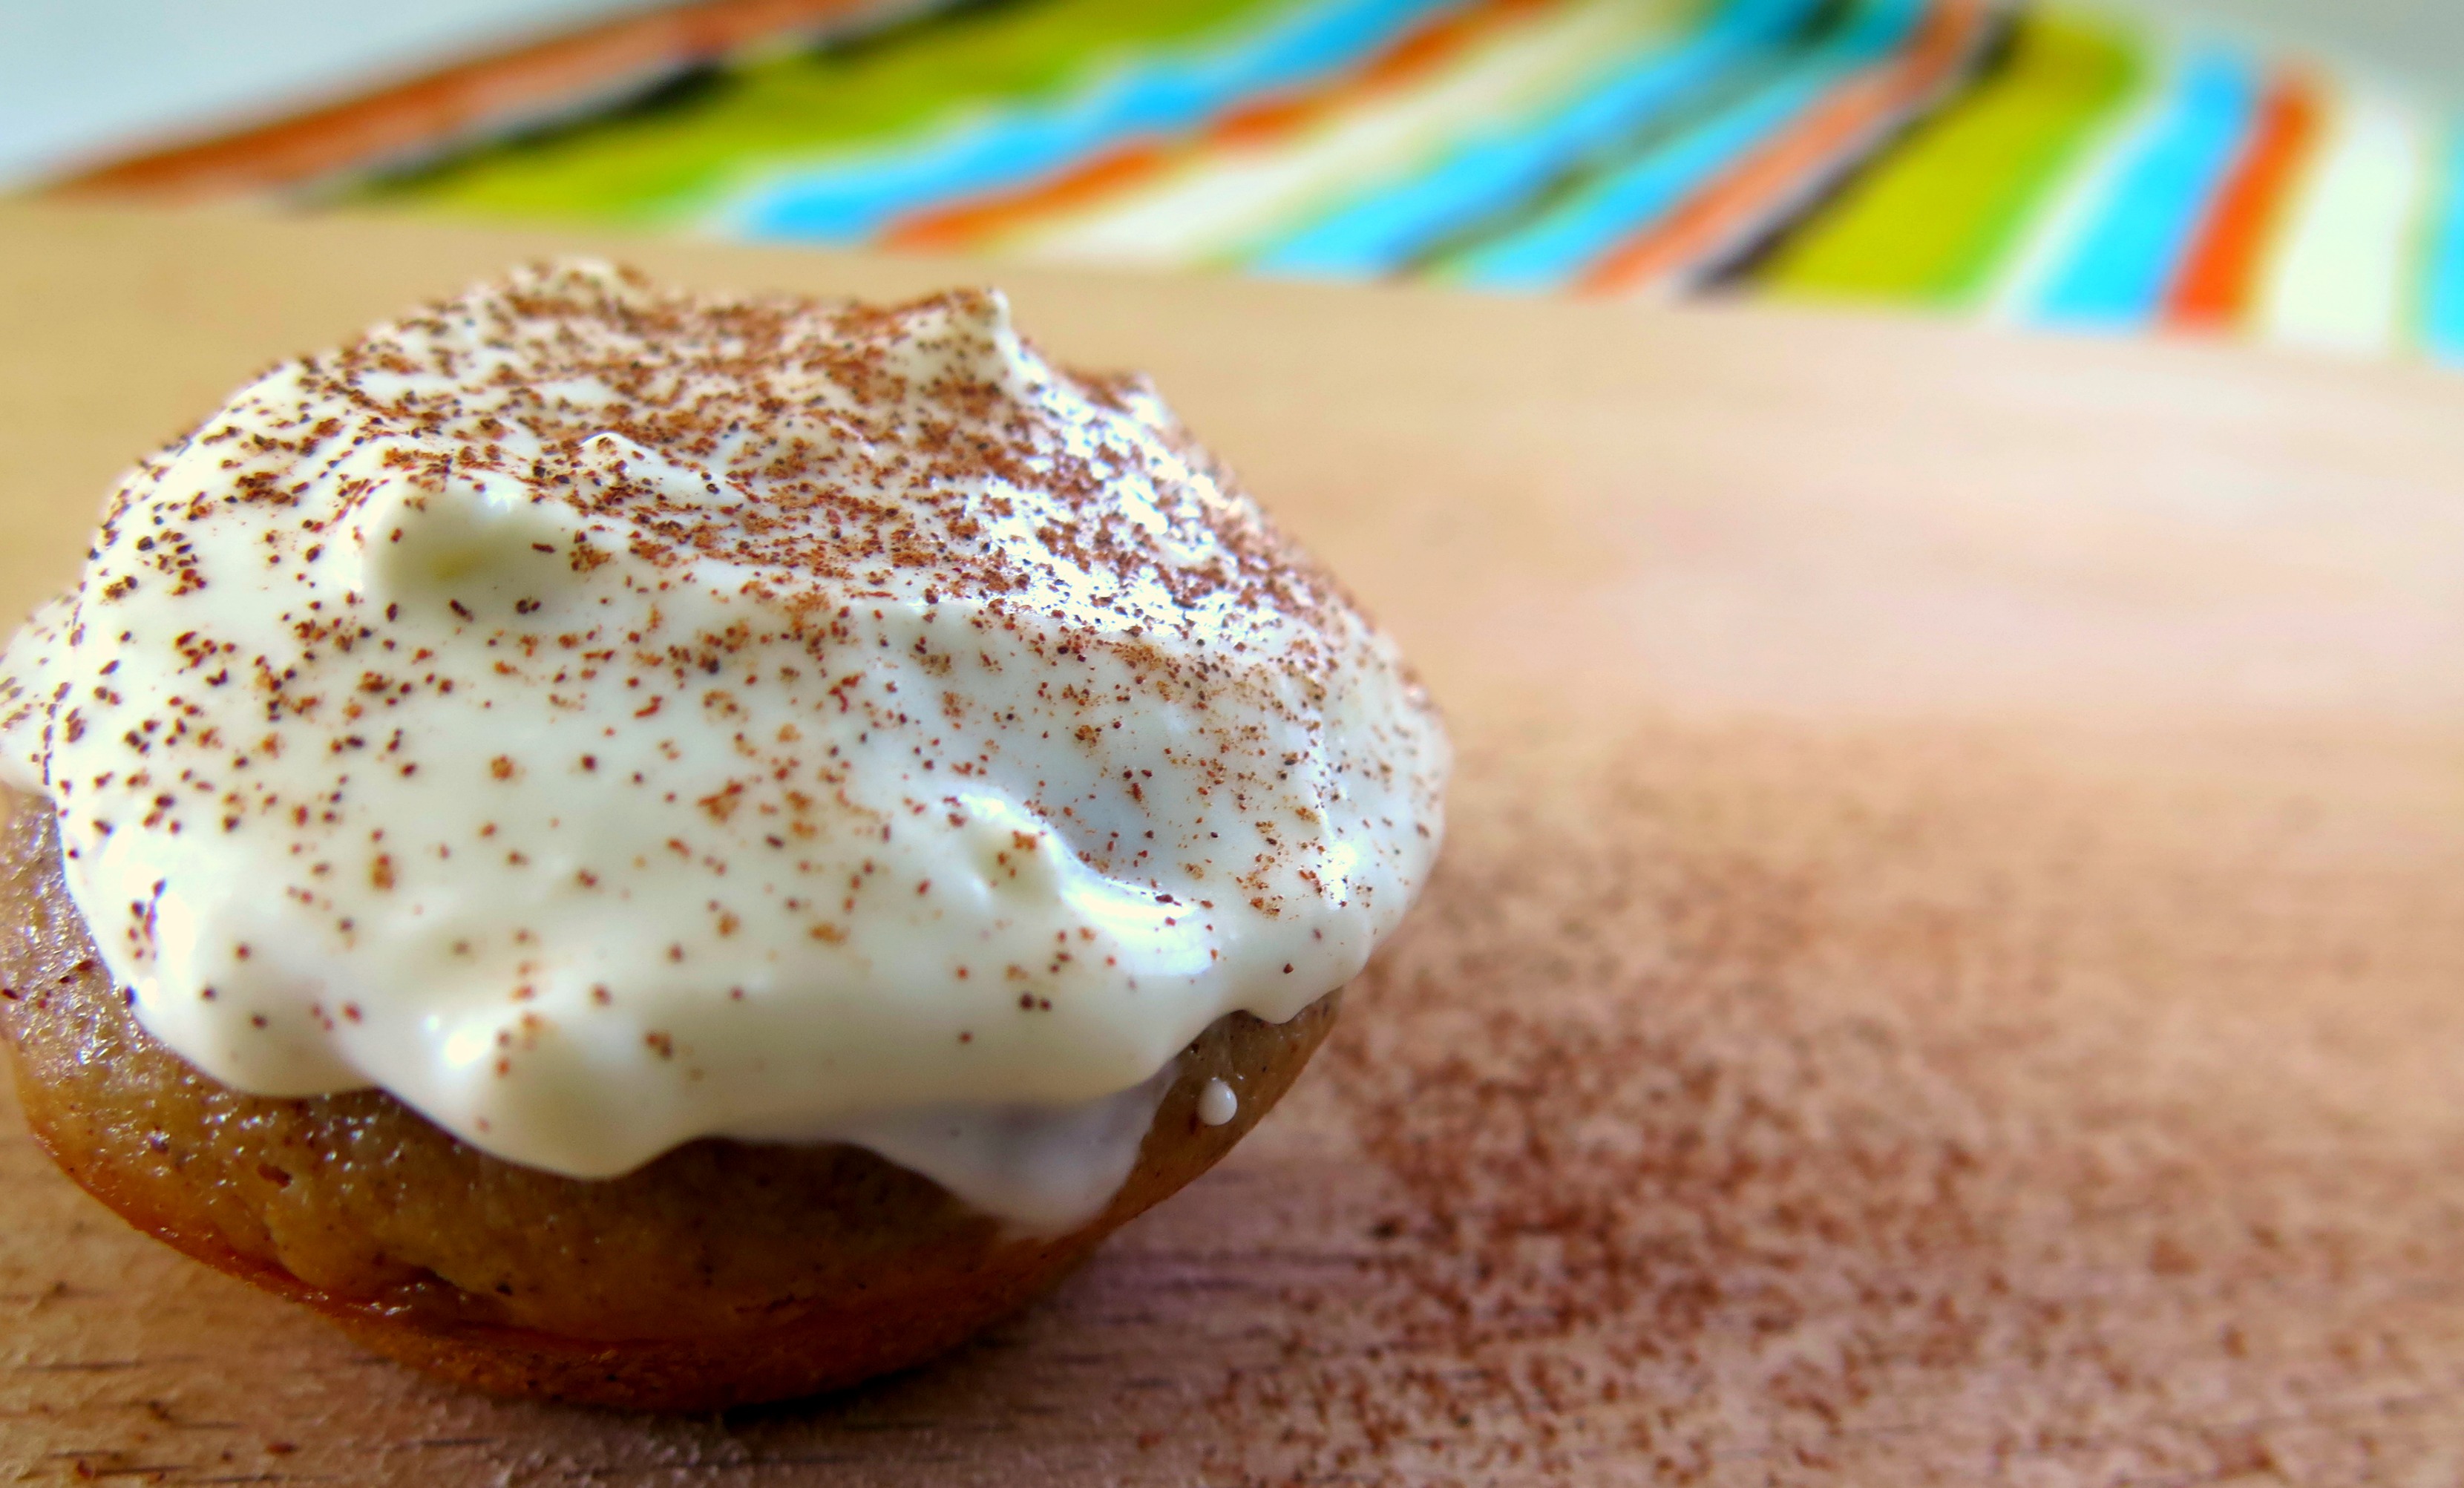
I’m in total Thanksgiving mode and because usually is just Mom and me… I decided to make something sweet to end our lunch, but small and cute to sweeten our life without making it too sweet.

That’s how these little Pumpkin Kisses came about…  you could also call them mini-muffins, but the idea of naming them Kisses was too tempting to pass.  They have a pronounced pumpkin and spice flavor with a delicate hint of maple.  I enjoy the frosting to focus on the cheese to balance the sweetness of the little cake itself.

In this recipe I used chia seeds instead of the typical egg-replacer I usually use in my baking recipes.  I had been experimenting with these diminutive seeds and I believe the method I use for this mini muffins is spot on, allowing the seeds to gelatinize in the batter before baking make for spongy little cakes, perfect to enjoy as a dessert, a snack or even breakfast…  such is the life of the food blogger, mmmm!

I bake this recipe in my toaster oven because it’s usually just me testing these recipes and because I only have two small mini muffin pans.  Therefore, I bake this recipe in 2 batches.  The batter will remain perfectly fine while you wait for the first batch to bake.  But if you are a tad inpatient, you can certainly make this in a larger mini muffin pan and turn on your large oven…

Let me know how you enjoy these…

Pumpkin Chia Mini-muffins

PUMPKIN CHIA KISSES

1 cup whole wheat pastry flour
½ cup brown sugar
1 ½ tsp baking powder
2 tsp chia seeds
2 tbs butter, melted
2/3 cups milk, I use 2%
1/3 cup fresh pumpkin, steamed and mashed
½ tsp vanilla powder
½ tsp ground cinnamon, plus more for garnish
¼ tsp salt
½ tsp freshly ground nutmeg

For the frosting:

½  packet or 4 oz of cream cheese          
4 tbs heavy cream
3 tbs maple syrup
1 tbs brown sugar, optional
  1. In a large bowl, mix all the dry ingredients – flour, sugar, baking powder and the chia seeds.  Whisk them well to make sure there are no lumps of flour or brown sugar in the mix.
  2. In a measuring cup measure and add the milk, melted butter and mashed pumpkin.  Mix it well to create a homogeneous mixture.
  3. Add it to the dry ingredients and whisk together until all ingredients are well incorporated.  Season mixture with salt, vanilla powder and spices.
  4. Rest the batter at room temperature on your kitchen counter for about 30 minutes.  This will allow the chia seeds to gelatinize inside the batter.
  5. Pre-heat oven to 350F.
  6. Butter the baking pan.  Pour the mixture using a 1tbs measure.  The batter may seem like a lot, but they rise nicely and they will not stick together.
  7. Bake in oven for 10 minutes until the cake has risen and it’s golden on top.  After 10 minutes have elapsed, turn the oven off but do not take the mini muffins out.  Not even open the oven door!! Wait about 20 additional minutes for the mini cakes to complete cooking with the residual heat already in the oven.  The muffins will be a total of 30 minutes in the oven.
  8. Take the mini muffins out of the oven and rest it on a cooling rack so they cool completely.  While the first batch cools, bake the second batch using the same method.
  9. While the mini-muffins rest, prepare the frosting – mixing in a large bowl the cream cheese, heavy cream and maple syrup using an electric hand mixer.  It’s possible the frosting might be a tad soft,  so I place in the fridge while the “kisses”  cool completely.
  10. With an offset spatula, spread the frosting over the kisses and decorate with a light sprinkle of grown cinnamon using a very fine sieve.

Pumpkin Chia mini-muffin

Image

Veggie Bites of Wisdom #57

14 Oct

Veggie Bites of Wisdom - KarmaFree Cooking

Apple Cranberry Crisp

28 Sep

Apples and cranberries… to me these fruits speak of autumn to me.  They remind me of chilly weather and getting cozy inside when the weather is getting cooler outside.

Trying to work with what nature gives us naturally each season, this is my tribute to those fall flavors I love so much.

Apple Cranberry Dessert with Oatmeal Gluten-free topping

APPLE CRANBERRY CRISP

3 large Granny Smith apples, cored and cut into chunks

2 large Gala apples, cored and cut into chunks

½ cup dried cranberries

1 cup cranberry sauce – recipe here

¼ cup cornstarch

1 cup brown sugar

The zest and juice of 1 yellow lemon

A pinch of salt

A pinch of vanilla powder


For the topping:

1 ½ cups of gluten-free flour

1 ½ cups of oatmeal

 1 ½ cups of brown sugar

1 ½ cups slivered almonds

1 ½ sticks of butter – cut into very small pieces

1 tsp cinnamon

1 tsp vanilla powder


  1. Pre-heat oven to 375F.
  2. In a large glass baking dish, dump the cut apples and mix in the dried cranberries, cranberry sauce, cornstarch, lemon zest, lemon juice, sugar and vanilla powder.  Mix well to combine.  Set aside.
  3. In a separate bowl mix together the flour, oats, brown sugar, cinnamon, vanilla, almonds, with the pieces of cold butter.  Using your fingers, or a fork, combine the butter with the rest of the ingredients until it becomes like the consistency of wet sand.
  4. Pour the topping over the apples evenly.  Bake in oven for about 30 minutes…  the apples will bubble and the topping will look cooked and somewhat golden.

I usually turn off the oven and leave it inside until we’re ready to eat… to me, it’s best served warm with a side glass of milk or vanilla ice cream.


Quinoa Tabbouleh

24 Sep

I am a lover of Middle-eastern food… ever since I visited Israel 15 years ago, I have been a fan of falafels, hummus, pita bread, rice pilaf, dolmades, among others.

Tabbouleh would be part of that fan list, however, the tabboulehs made usually in Middle-Eastern restaurants are too heavy on the parsley for my taste.  And now that I am trying to avoid wheat sometimes, well I rather order the arab salad of tomatoes, cucumbers and onions and skip the tabbouleh all together.  Traditionally, tabbouleh is made with cracked wheat.

For the last time I cooked in the Yoga Center, I wanted to make a Middle-Eastern inspired menu and it all revolved around the fact I wanted to make this salad.  We made hummus, a salad with mixed herbs including mint, rice with spinach, mushrooms and nuts, which is not like the rice pilafs I am used to having at middle-eastern restaurants, but it fit better for the Yoga appetites.

This recipe also makes use of the abundance of avocados we have right now in Puerto Rico…  and what dish is not instantly improved by adding avocado to it??


Recipe by KarmaFree Cooking

QUINOA TABBOULEH with Avocado

2 cups of quinoa

1 vegetable bouillon cube

The zest and juice of 6 yellow lemons

2 bunches of scallions, thinly sliced

1 large red onion, finely chopped

1 bunch of flat-leaf parsley, finely chopped

1 cup of fresh spearmint leaves, julienned

4 cups of cherry tomatoes, halved

2 seedless cucumbers, unpeeled and diced

1 avocado, diced

½ cup extra-virgin olive oil

Salt and Freshly Ground Pepper


  1. Cook the quinoa first… by adding 4 cups of water to a medium saucepan with the vegetable bouillon cube.  When the water reaches a boiling point, add the quinoa.  Add a drizzle of olive oil, just like you would when making rice.  Cover and lower the heat to simmer until the quinoa cooks, about 15-20 minutes.
  2. After the quinoa is done, fluff it with a fork and season with ¼ cup of the olive oil and the zest and juice of 3 lemons.  Set aside.  If you are making this ahead of time, you can stop here and store the cooked quinoa in the refrigerator after it has had a chance to cool off a bit.
  3. In a large bowl, combine the scallions, onions, parsley, spearmint leaves, tomatoes, and cucumbers.  Add the cooked quinoa and toss all the ingredients together.  Season the whole salad with the additional ¼ cup of olive oil, the zest and juice of the remaining 3 lemons, salt and pepper to taste.  Toss again well to combine.  Let all the flavors combine about 30mins – 1 hour before serving.

When you’re about to serve, garnish with the pieces of avocado.  Serve at room temperature or refrigerate and serve cold.

Avocado Pasta

22 Sep

Avocado season is here…  and even though a few slices of avocado is the perfect accompaniment to any meal, and with so many ripening all at the same time, I’ve had to find creative ways to eat them all by myself…

This Avocado Pasta has become the last few weeks in my go-to lunch… it’s easy to make, mainly an assembly of flavors, because all you are cooking is the pasta.  Think of it like a pasta salad meets a guacamole and they decide to hang out together…  It’s refreshing because of the addition of the spearmint leaves.  Do not skip them… it’s partly what makes this dish special.  Trust… and your taste buds will be rewarded.

Recipe by KarmaFree Cooking


AVOCADO PASTA

2 cups uncooked pasta, I use gluten-free quinoa pasta

2 medium avocados, chopped

1 shallot, minced

15-20 grape tomatoes, halved

15 spearmint leaves and 5 extra ones, all julienned and separated

5-6 sprigs of flat-leaf parsley, chopped

The juice of 1 lime

3 large handfuls arugula

Extra Virgin Olive Oil

Garlic Salt

Salt and Pepper


  1. Cook by boiling your desired pasta in salty water according to the package directions…  I used quinoa pasta this time around.  I buy it at Costco.
  2. While the water boils and past cooks, prepare the avocado mixture – in a bowl mix together the avocados, shallot, lime juice, tomatoes, parsley, 15 spearmint leaves.  Season with olive oil, salt and pepper and toss well to combine the flavors.

Recipe by KarmaFree Cooking

3.  When the pasta is fully cooked, drain it well and add to the bowl where the avocados and tomatoes have been marinating.  Toss well to combine.  Add the arugula leaves, a light sprinkle of garlic salt and extra spearmint leaves and toss one final time to combine and for the arugula to wilt a bit.

Serve immediately.

Recipe by KarmaFree Cooking

%d bloggers like this: