Archive | snacks RSS feed for this section

Yogurt Cheese

21 Apr

I am trying to learn to live with a little less cheese in my life…   My personal trainer used to tell me that that little belly I complain soooooo much about has a name – QUESO!!!! 

Cheese usually has a lot of fat.  I don’t like to buy the low-fat kinds usually because they replace the fat with plenty of chemicals to emulate the mouth-feel.  So I rather eat the real full-fat kind and eat less of the chemicals in the process.  I do like the reduced fat cream cheese though…

But sometimes, too much of a good thing can be not-so-good for you.  There was a time in my life when my doctors eliminated all dairy from my diet.  It was absolute HELL!!!  At the time, I used to drink at least 2 huge mugs of milk with chocolate a day.  Ohhh, I also got caffeine eliminated from my diet too.  Caffeine I can understand better, but Milk, Cheese,  how?!?!?!?

Over the years,  I have learned to have soy milk or rice milk based cheeses.  They are actually very ,very nice.  There are some better brands than others…   I know.  But they tend to be expensive. And I have to take a special trip to the natural food store to get them… not usually available at my neighborhood grocery store.

Some years ago, I learned that for people who tend to be lactose intolerant, yogurt seems to agree with them and it’s a great way to get calcium in your diet.  Something to do with the live active cultures. 

So I decided to make yogurt cheese – all the benefits of yogurt, the consistency of cream cheese.  It’s economical, because I can make it with regular yogurt I can find at my regular grocery store.  And, there’s hardly anything to it…  Too many pluses to count.  Don’t you think? 

I try to use organic plain yogurt.  I always read the label to make sure it has no added gelatin.  Unfortunately, most commercial fruit-flavored yogurts (the Dannons and Yoplait yogurts of the world…) all have added gelatin.  I usually buy Stonyfield Farms or some other organic brand.


YOGURT CHEESE

6oz container of plain low-fat yogurt – I started small, but the next time I’ll make a whole pint
1 tsp kosher salt


  1. In the same container the yogurt comes in, mix in the salt.
  2. Empty the salted yogurt onto a fine mesh strainer lined with a cheese cloth or 2 coffee filters.  I used the unbleached kind.
  3. Place a bowl under the strainer to catch all the liquid that will drain.  Cover the yogurt on the strainer with cling wrap or the cover of the bowl you placed underneath and place in the fridge for about 24 hours. 

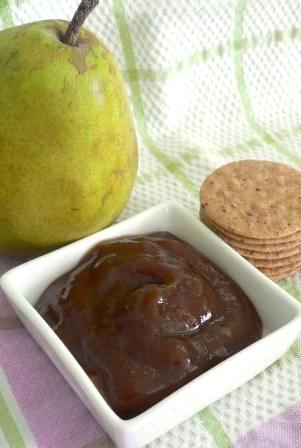
The whey will drain off and the yogurt left will have the thick consistency of cream cheese.

Use the same way you would use cream cheese or even ricotta cheese – on crackers, toast, in a sauce, on top of pasta… 

Ode to Vermont Sandwich

8 Apr

To honor Vermont and their cheeses, I made myself this simple open faced sandwich…  I had read about this sandwich combination a long time ago, but it always stayed on my mind.


ODE TO VERMONT SANDWICH

2 slices of sprouted wheat bread
Pear Spread
Extra Sharp Vermont Cheddar Cheese – I used Vintage, but any kind of Vermont cheddar will do
2 slices of veggie bacon


  1. Toast the bread – I use a toaster over, so I placed the veggie bacon slices right next to the bread to heat up a bit, while saving time and energy
  2. Spread the Pear Spread onto the bread slices – go as heavy or light as you’d like
  3. Layer the cheese
  4. Top with the veggie bacon


I know the pictures are not very artistic, but the flavors were excellent – a reminder of Vermont and all their great produce.  Love it!!!


Pear Spread

3 Apr

Pears have been on sale for the longest time every time I visit the grocery store.  So I decided to buy some the other day to make my roasted pears for the French Dinner.  I love these roasted pears, but it was time for some diversity…  so I decided to make butter – Pear Butter.

I am not going to question how the name came to be… especially after my previous post about a punch called a “bull”.  If I were to name this in Spanish it would probably be something like “Compota de Peras” or Pear Compote.  However, I believe the name Pear Spread is truer to the final application.

Here’s how I made it…


PEAR SPREAD

2 ripe Bartlet Pears, peeled, cored and cut into 1-inch pieces
½ cup water
2 tbs white balsamic vinegar
2 tbs freshly squeezed lemon juice
 
¾ cup brown sugar
1 tsp vanilla powder
1 cinnamon stick
Pinch of salt


  1. Combine pears, water, vinegar and lemon juice in a medium heavy saucepan.  Cover and simmer until pears are soft, stirring occasionally, about 20-25 minutes.
  2. Puree the mixture using a hand blender or in a food processor.  If using the food processor, be careful transferring the mixture to the food processor and back into the saucepan again, because the liquid is very hot.
  3. Add the sugar, vanilla, cinnamon and salt to the pureed mixture.  Stir over low heat until the sugar dissolves.
  4. Increase the heat to medium and boil gently uncovered until mixture reduces and thickens, about 1 hour.  Stir occasionally to prevent any scorching in the bottom.
  5. Discard the cinnamon stick.  Spoon the spread into canning jars if canning.  I do not know how to do that, so I just waited for the mixture to cool down some and transferred to a plastic container and ate it all within a week.


Hazelnut Praline

7 Mar

I have been meaning to share with you some desserts, but I wanted to make them with Almonds.  Every-time I go to the market, I forget to buy them.  If I don’t write it, I will never remember it.

Then the other day I was reorganizing my fridge (in preparation to my upcoming trip to Costco) and I found along lost bag of shelled hazelnuts.  My dear mom helped me shell these hazelnuts I bought before Xmas and I never got to eat and they were sitting, very unassumingly, in this ziplock bag in the back of my fridge… how about Hazelnut Praline!!!  I am sure it will taste fantastic too.  It did…

 p1030072.jpg                

HAZELNUT PRALINE

1/2 cup shelled hazelnuts
1 tbs maple sugar
1 1/2 tbs maple syrup
  1.  I like to start with peeled hazelnuts.  I think the taste of the nut comes across better when the little skin is taken off.  So to do this with hazelnuts, I roasted them for a little while in a 350F oven for about 10 minutes.  They’ll start to smell a bit.
  2. Then place them in a clean kitchen towel and scrub them all together.  Most of the skins will come off.  Some I had to peel a bit of my hands.  Wait a bit until the nuts cool down some.  You don’t need to get your fingers burned.
  3.  p1030076.jpg
  4. Cut the hazelnuts in a smaller pieces.  I used a serrated knife and it worked very well.  The nuts did not fly all across the cutting board.
  5. Mix the nuts in a medium bowl with the maple syrup and maple sugar.  Transfer to a parchment lined baking sheet and bake in a 350F oven for about 12 minutes.  I try not to leave the kitchen because nuts tend to burn fast and remember, you may have already roasted them a bit already to skin them.
  6. When they’re done, they’ll smell really sweet and nutty delicious.
  7. Be careful taking them out of the oven, but transfer then to a metal dish right away to help them cool off.  I sometimes put the nuts in the fridge to help keep them away from the humidity we always have here in PR.

p1030085.jpg

Snap the nuts loose and eat them alone as a snack or sprinkle them over your favorite dessert.  I particularly enjoyed them today with my Roasted Pears with Blue Cheese.

Acid Fruit Salad

19 Jan

Fruit salad come in different varieties – those made with what we call “sweet” fruits – like bananas, papayas, mangoes, red apples, etc.  And my favorite, “acid” fruit salads, made with fruits that are more tart, like oranges, kiwi fruit, grapes, strawberries, pineapples, etc.

At work, we planned a breakfast to celebrate a co-worker’s birthday.  I was somewhat surprised thta no one had offered to bring any fresh fruits.  The “pot luck” menu was full of baked goods, greasy foods and not a fruit in sight.  So I offered to bring a fruit salad.  This is one of my favorite combinations…

 fruit-salad.jpg

ACID FRUIT SALAD

1 pineapple, peeled, cored and cut in small pieces
5 kiwi fruit, peeled and cut in small pieces
2 granny smith apples, peeled, cored and cut in small pieces
1 medium bunch of green or red grapes, cut in half and seeded, if not seedless
2 navel oranges, peeled and supremed
4 red plums, peeled and cut into small pieces
the juice of 1 lemon
honey to taste
  1. Mix in a large bowl the pineapple, kiwi fruit, grapes and plums. 
  2. When you peel and cut the apple, drizzle some of the lemon juice to prevent browning.  Add to salad.
  3. To supreme the oranges, peel all the orange until you reach the flesh.  With a paring knife, cut in between each membrane so you get clean segments of orange without the membrane.  This way it’s easier to eat.  Add to the salad.  Squeeze the membrane over the salad to capture any remaining juice.
  4. Drizzle with some honey to sweeten if the fruits are too tart.  This will also help “juice” the fruits a bit.

This is the best way to start your day… Enjoy!!!