Tag Archives: malanga

Taro Root Nests

14 Sep

I’m in love with taro root or malangas, as I call them on a daily basis…

Here is a fun and easy way to make taro root for your next party of gathering.
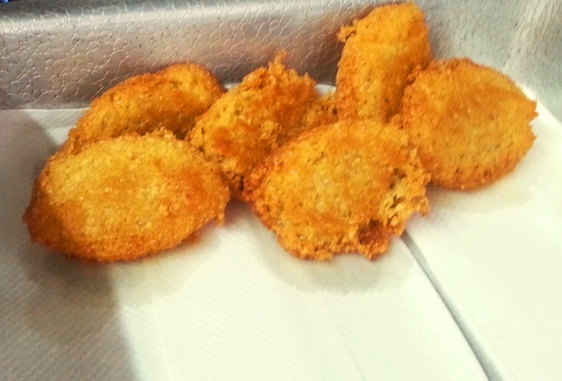
Taro Root Nests

TARO ROOT NESTS

1 pound of raw taro root, peeled and cut into long pieces
1 tsp sofrito
2 garlic cloves, peeled
1 tsp salt
A pinch of freshly cracked black pepper (optional)
Frying oil – canola oil, grape seed oil, vegetable oil, peanut oil, etc.
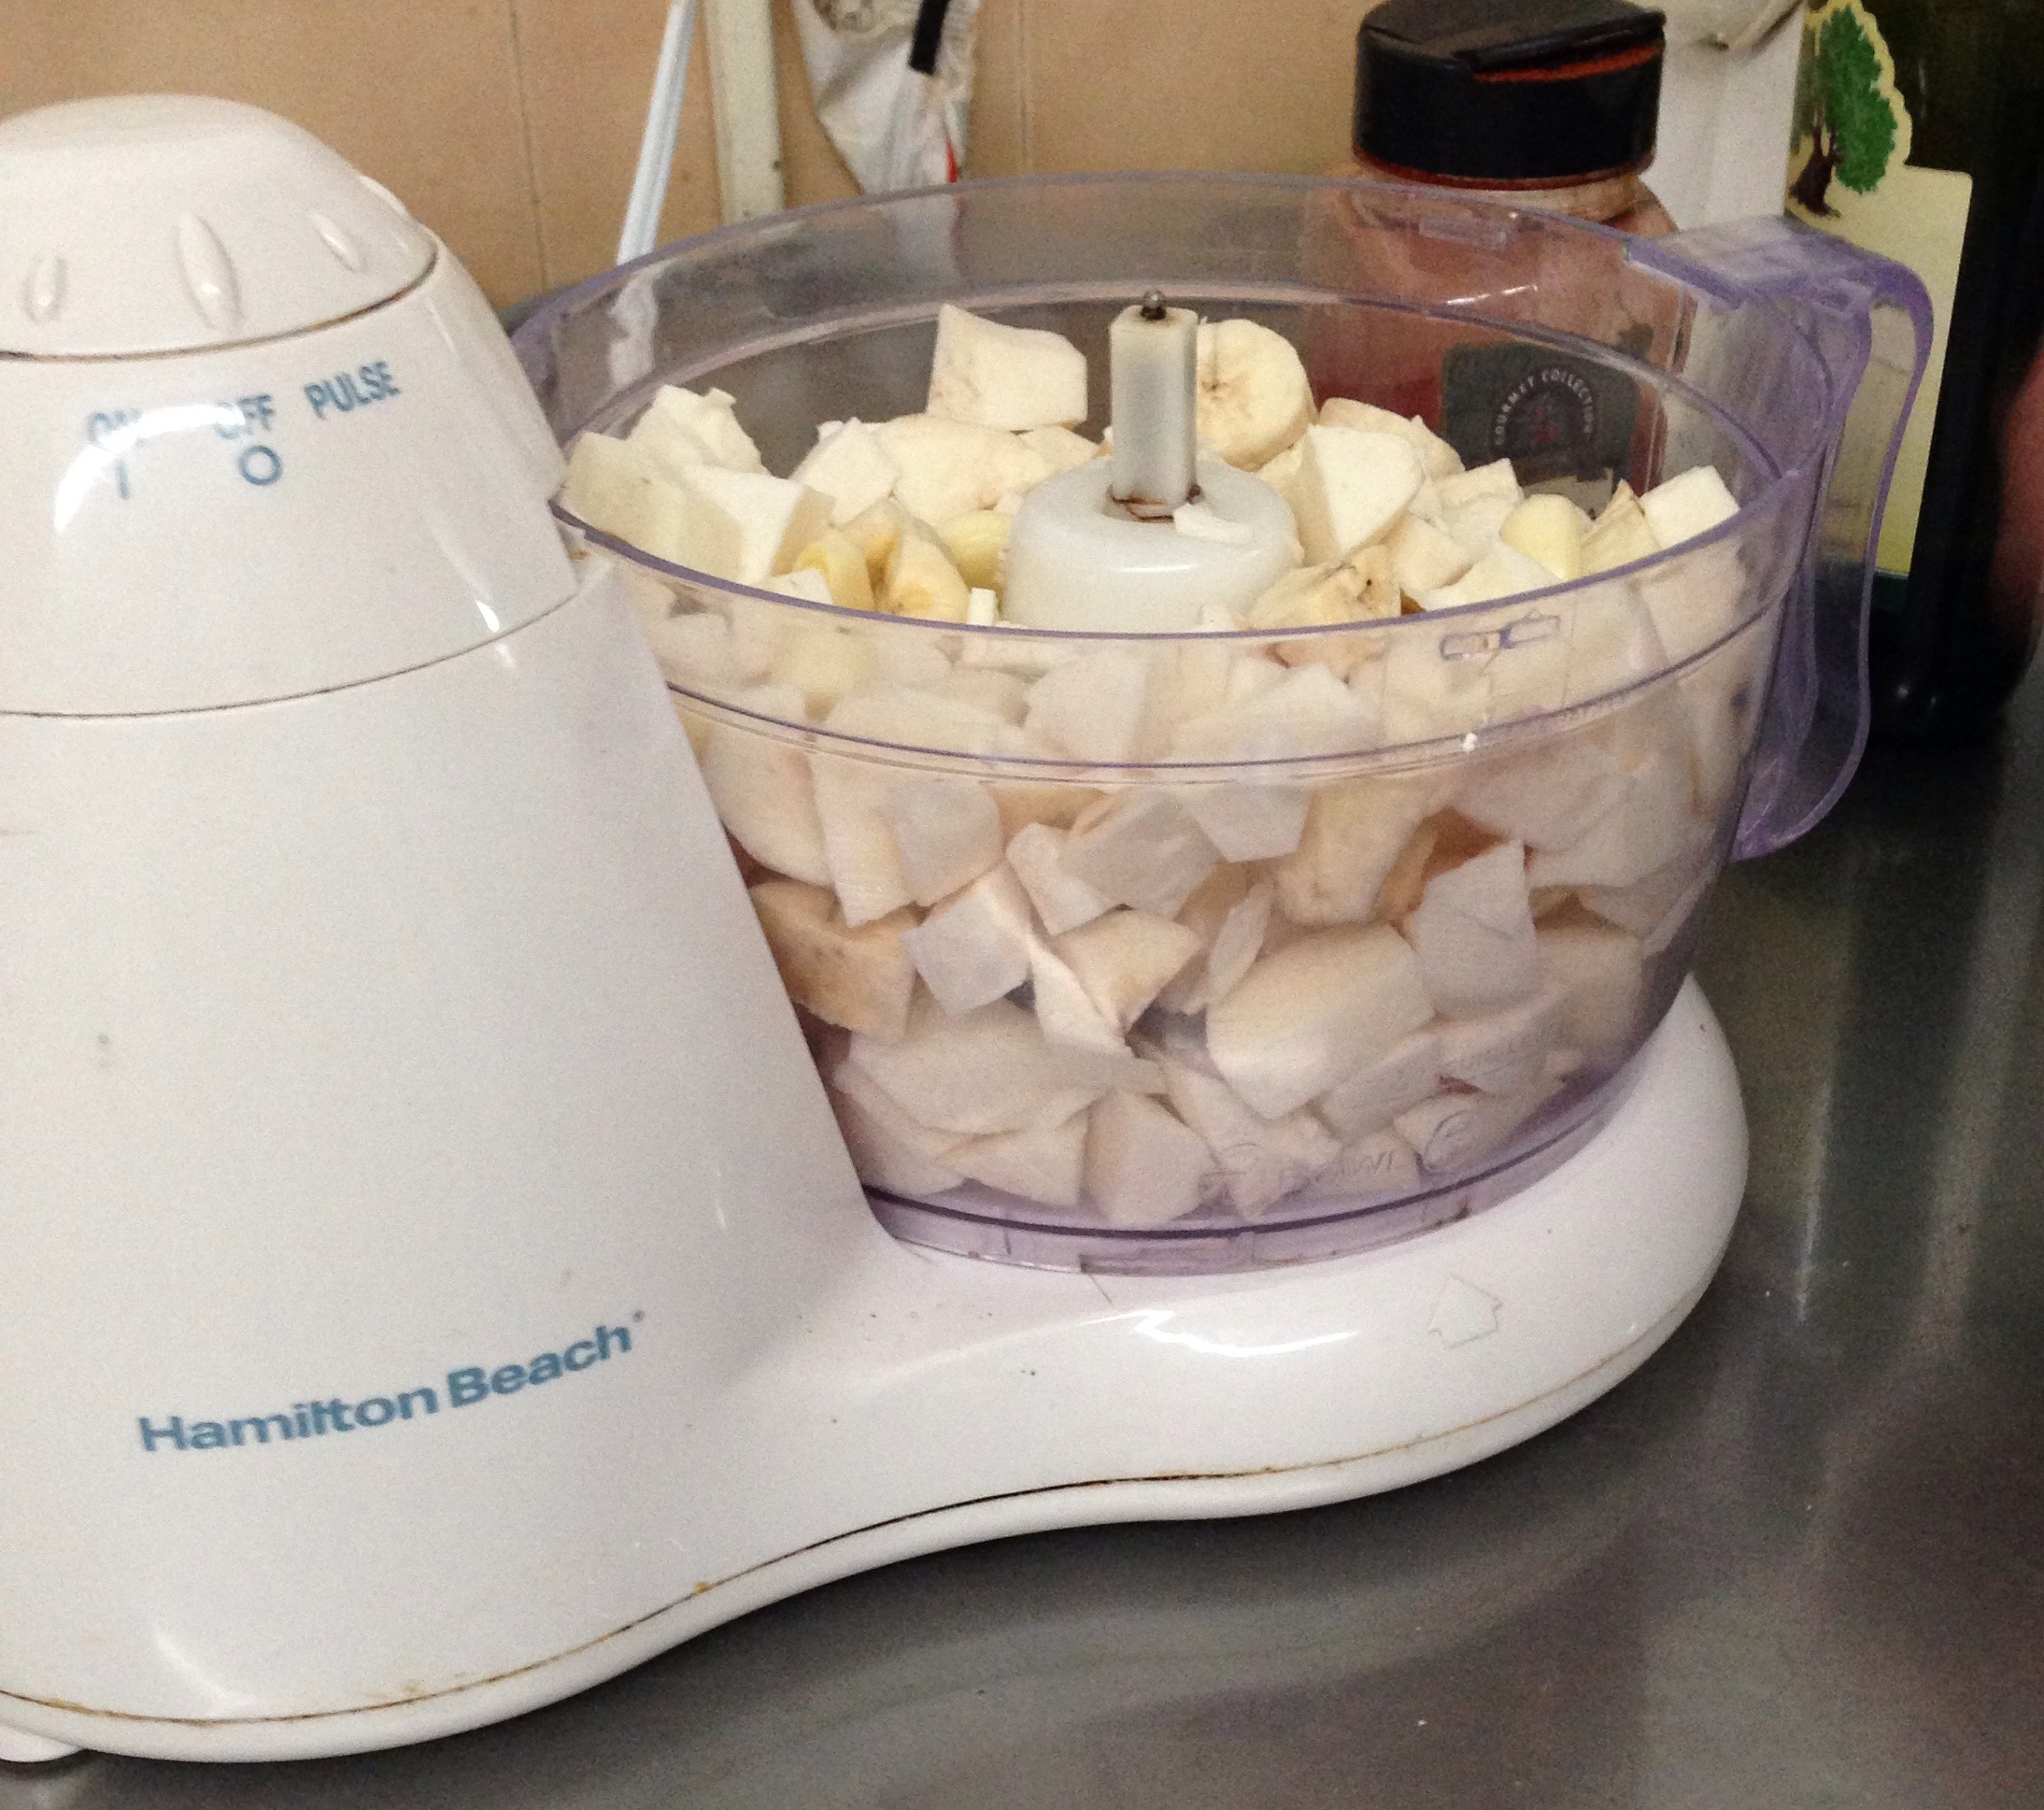
  1. Shred the taro root pieces using the shredding blade of your food processor.  You could also shred by hand using a box grater, but this would be much harder and take up more time.
  2. Transfer the shredded taro root to a large mixing bowl and season with the sofrito, salt and black pepper.  Grate the garlic cloves using a microplane grater over the shredded taro root mixture.  Combine well all the ingredients using your hands.  I find they work best for doing this.
  3. In a large skillet, add enough frying oil to make it about ½” to 1” deep and bring to temperature over medium-high heat.  The oil will be ready for frying when you stick the back of a wooden spoon into the oil and bubbles form all around it.
  4. Make mounds of the seasoned shredded taro root…  Squeeze out all the starchy liquid from it and place on the hot oil to fry.  Using a spoon, pour some of the hot oil over the mound of shredded taro root to help it cook on the inside and to start to harden the top part a bit.  Place mounds of taro root on the skillet leaving some space between the mounds so they don’t stick together.
  5. After a few minutes, flip the mound on the other side so it fries evenly on all sides.  When the taro root mounds are golden brown on all sides, take them off the oil using a wooden spoon and place them on a plate lined with paper towels to absorb all the excess oil.  If you want, you can sprinkle them lightly with some more kosher salt, but it may not be necessary.

Enjoy these little nest fritters as an appetizer or as the crispy component to any Latin dinner…

Yautía Fritters

27 Dec

I learned to make these fritters from Mili at the Yoga Center. She was always a champion of having something fried in our Saturday menus…

I have always been a great fan of anything fried, but to be honest, never made these yautía fritters myself. So why in the world did I want to include them as part of a Cooking Class menu??? Beats me…

So I had to prepare fast, real fast to make a recipe that I could replicate time and time again, and that it tasted as good as Mili’s always did. Thank goodness yautías and most viandas are on sale during Xmas because they’re used in so many typical recipes.

Frituras Yautia - INgredients

Here are the results… I hope you enjoy them as much as the cooking class students did.

Frituras Yautia 3

YAUTÍA FRITTERS

2 medium sized yautías, peeled and cut into small pieces
1 green banana, peeled and cut into small pieces
3 tbs sofrito
2 large garlic cloves, peeled and cut into smaller pieces
1 tsp salt
1 tbs olive oil
Sprinkling of paprika
Frying oil – Grapeseed oil or Canola Oil
  1. Add all the ingredients in a food processor and blend until you create a puree.
  2. With a spatula, scrape off the sides of the bowl of the food processor to make sure all the mix is evenly pureed.
  3. Using a skillet with about ½ inch of oil over medium high heat, fry the fritters creating small mounds with 2 spoons.
  4. When they’re golden brown on both sides, transfer them to a plate with paper towel to soak up any extra oil.

Processing Frituras yautia

These fritters are easy… and delicious. You can make them in a cinch. Perfect for an impromptu parranda. They taste like an alcapurria without the filling.

Masa Frituras Yautia

When we were making them at the cooking class, Angie told me if we had left a bit of the soy filling from the yuca pastelón, we could’ve demonstrated how this masa works for an alcapurrias too.

Malanga Chips

18 Jun

Tonight is the Top Chef Chicago reunion show…  I will tune-in because I want to see who wins Fan Favorite.  I would like to see Richard win.  He was a great chef, competitor and human being all around.   I already told you some about it here.  Stephanie got the grand prize, and I am super glad for it, so I think Richard should get Fan Favorite and get that $10,000 prize…

Because the show is at 10PM, and I usually watch it a bit later (thanks to TiVo) I usually get the munchies… so for a late-night snack, I want to make something that is a little homage to this season finale in Puerto Rico, but also to Season 2 finale in Hawaii…  Malanga Chips, or as the Hawaiians might call them, Taro Chips.

This is what a Malanga or Taro looks like at the grocery store or farmer’s market.  Its sort-of oval in shape and the flesh is lilac and speckled.


               www.khiewchanta.com                                 www.gourmetsleuth.com

I’ve never been to Hawaii – at least not yet… but I learned in the Top Chef Season 2 finale that Taro, or Malanga as we call it here in Puerto Rico, is very widely used, particularly in a typical dish they have called poi.  In Puerto Rico, we mostly boil them in salted water and eat them cut in pieces or mashed drizzled with olive oil. 

But just like any other root vegetable we can make chips… here’s how.


MALANGA CHIPS

1 small malanga, washed and peeled
1 cup of canola oil to fry
Garlic Salt to sprinkle liberally


  1. In a large skillet, heat up canola oil until it is hot enough to fry.  Use the back side of a wooden spoon to know when the oil is ready.
  2. Using a mandolin, slice the malanga in slices as thinly as possible.
  3. Drop the malanga slices onto the oil to fry.  They’ll take about 10 minutes.  Flip them over to make sure the chips fry evenly on both sides.
  4. When the edges start to turn a light golden color, remove them from oil.  Drain them on a paper towel and sprinkle with garlic salt.


I also did a test BAKING the chips instead of frying them.  They actually turned out OK.  Here’s what I did:

  1. Pre-heat oven to 400 F.
  2. Place the malanga slices side-by-side on a baking sheet.  They can touch, but try that they are not on top of each other so they can cook evenly.
  3. Brush each slice on both sides with canola or olive oil.
  4. Bake for about 10-15 minutes.  After the first 10 minutes watch them a bit, and when the edges start turning golden brown, take them out.  They can burn really easily.
  5. Transfer them onto a paper towel to drain any excess oil and sprinkle them with garlic salt.


You can find these in bags already made in health foods or street vendors around Puerto Rico…

Nice and crispy home-made snack for any occasion.  This would be a perfect substitute for any potato chip occasion.  Try it… and let me know if you love them too.

Oooooooooooooooooooooooooooooooooooooooooooooooooooooooooooooooooooooooooooooooo

A bit of nomenclature housekeeping here… and I say this in no way to confuse you.  Just in the interest of being helpful in understanding my post and the main ingredient.

Malanga is the Puerto Rican word used for a Taro root vegetable.  Cubans use the word malanga to refer to a different kind of root vegetable – the one we call yautía in Puerto Rico, which there are 2 kinds – yautía blanca/malanga blanca and yautía lila/malanga lila .  Yautía or Cuban malanga looks like this…

www.gothamstudio.com

Just wanted to you that I know there is a difference in how you call these depending on where you live or how your parents call it.

%d bloggers like this: