Tag Archives: fritter

Taro Root Nests

14 Sep

I’m in love with taro root or malangas, as I call them on a daily basis…

Here is a fun and easy way to make taro root for your next party of gathering.

Taro Root Nests

TARO ROOT NESTS

1 pound of raw taro root, peeled and cut into long pieces
1 tsp sofrito
2 garlic cloves, peeled
1 tsp salt
A pinch of freshly cracked black pepper (optional)
Frying oil – canola oil, grape seed oil, vegetable oil, peanut oil, etc.
  1. Shred the taro root pieces using the shredding blade of your food processor.  You could also shred by hand using a box grater, but this would be much harder and take up more time.
  2. Transfer the shredded taro root to a large mixing bowl and season with the sofrito, salt and black pepper.  Grate the garlic cloves using a microplane grater over the shredded taro root mixture.  Combine well all the ingredients using your hands.  I find they work best for doing this.
  3. In a large skillet, add enough frying oil to make it about ½” to 1” deep and bring to temperature over medium-high heat.  The oil will be ready for frying when you stick the back of a wooden spoon into the oil and bubbles form all around it.
  4. Make mounds of the seasoned shredded taro root…  Squeeze out all the starchy liquid from it and place on the hot oil to fry.  Using a spoon, pour some of the hot oil over the mound of shredded taro root to help it cook on the inside and to start to harden the top part a bit.  Place mounds of taro root on the skillet leaving some space between the mounds so they don’t stick together.
  5. After a few minutes, flip the mound on the other side so it fries evenly on all sides.  When the taro root mounds are golden brown on all sides, take them off the oil using a wooden spoon and place them on a plate lined with paper towels to absorb all the excess oil.  If you want, you can sprinkle them lightly with some more kosher salt, but it may not be necessary.

Enjoy these little nest fritters as an appetizer or as the crispy component to any Latin dinner…

Taro Root Fritters

10 Dec

This is a recipe featured in Qué Rica Vida – the Spanish-language community site featuring great  recipes from a variety of bloggers, including Karma Free Cooking.

Viandas, as we call them in Spanish or at least in Puerto Rico, are part of the staples in Caribbean gastronomy.  Viandas are a variety of root vegetables and edible tubers which form part of our diet since the times of the Taíno Indians, Puerto Rico’s first inhabitants.

Malanga or Taro Root is one of my favorite viandas…  It has a sweet taste and its speckled lilac interior is very pretty.  These are particularly popular in Hawaiian cuisine in the form of poi, a mashed version of taro root.

Taro Root

Typically, viandas are boiled in salted water and eaten with various accompaniments, and their starchy consistency makes them perfect to make into fritters.  The perfect example of this is Alcapurrias.  But we don’t always have the time to make a filling, make the masa, fill the alcapurrias and fry them.  So this fritter is a great short-cut to get the payoff of a fritter without a lot of work.  You can read the whole recipe in Spanish in Qué Rica Vida here.

Taro Root Fritters

TARO ROOT FRITTERS

1 pound of raw taro root, peeled and cut into 1-inch pieces
1 tsp sofrito
2 garlic cloves, peeled
1 tsp salt
A pinch of freshly cracked black pepper (optional)
  1. Add all the ingredients into the bowl of a food processor and process until you create a homogeneous puree.
  2. Using a spatula, scrape the sides of the bowl to make sure the mixture is well combined.
  3. In a large skillet add enough frying oil for it to be about ½ – 1” deep.  Place over medium-high heat until the oil bubbles a bit around the tip of a wooden spoon when submerged in the oil.
  4. Using a measuring spoon, measure about 1tbs of masa and create small balls and place in the hot oil.  Fry balls on all sides until they’re golden brown.  Once the skillet is filled with balls frying, turn down the heat to make sure the inside of the fritter is cooked without burning the outside.
  5. When they’re done, take them from the skillet using a slotted spoon and place on a plate lined with paper towels to cool off and catch all the excess oil.

Taro Root Fritters

You can enjoy these fritters on their own… or with a delicious vegan mayo and mustard dipping sauce.  This recipe makes about 24 fritters.

Yautía Fritters

27 Dec

I learned to make these fritters from Mili at the Yoga Center. She was always a champion of having something fried in our Saturday menus…

I have always been a great fan of anything fried, but to be honest, never made these yautía fritters myself. So why in the world did I want to include them as part of a Cooking Class menu??? Beats me…

So I had to prepare fast, real fast to make a recipe that I could replicate time and time again, and that it tasted as good as Mili’s always did. Thank goodness yautías and most viandas are on sale during Xmas because they’re used in so many typical recipes.

Frituras Yautia - INgredients

Here are the results… I hope you enjoy them as much as the cooking class students did.

Frituras Yautia 3

YAUTÍA FRITTERS

2 medium sized yautías, peeled and cut into small pieces
1 green banana, peeled and cut into small pieces
3 tbs sofrito
2 large garlic cloves, peeled and cut into smaller pieces
1 tsp salt
1 tbs olive oil
Sprinkling of paprika
Frying oil – Grapeseed oil or Canola Oil
  1. Add all the ingredients in a food processor and blend until you create a puree.
  2. With a spatula, scrape off the sides of the bowl of the food processor to make sure all the mix is evenly pureed.
  3. Using a skillet with about ½ inch of oil over medium high heat, fry the fritters creating small mounds with 2 spoons.
  4. When they’re golden brown on both sides, transfer them to a plate with paper towel to soak up any extra oil.

Processing Frituras yautia

These fritters are easy… and delicious. You can make them in a cinch. Perfect for an impromptu parranda. They taste like an alcapurria without the filling.

Masa Frituras Yautia

When we were making them at the cooking class, Angie told me if we had left a bit of the soy filling from the yuca pastelón, we could’ve demonstrated how this masa works for an alcapurrias too.

Puerto Rican Pumpkin Fritters

3 Dec

In Puerto Rico, these pumpkin fritters are called “barriguitas de vieja” or “old lady bellies”… I just think that name is a tad discriminatory. Who said all old ladies bellies are sweet and wrinkly??? I am sure some old bellies out there are not sweet… LOL!!!!! I am so lame, I laugh at my own jokes…

Enjoy these, which are super delicious regardless of my bad jokes.

Puerto Rican Pumpkin Fritters

PUERTO RICAN PUMPKIN FRITTERS

2 cups fresh pumpkin puree
½ cup whole wheat pastry flour
1/3 cup brown sugar
1 tsp ground cinnamon
A few grates of fresh nutmeg
½ tsp salt
1 ½ tsp egg replacer + 2 tbs water
Canola Oil for frying
  1. First we steam the pumpkins to make the puree… I just peel and cut some pumpkin pieces and place them in a shallow pan that has a lid. I add about ½ inch of water and some kosher salt. Cover the pan and bring to a boil over medium-high heat. As soon as you hear the water inside boiling, turn down the heat and allow the steam inside cook the pumpkins for about 10-15 minutes. Check the pumpkins at about 10 minutes… if they’re not completely done, just cover again, wait about 1 minute and turn off the heat and leave there uncovered for some 10-15 minutes more. They’ll be done by then.
  2. I just take the pumpkin pieces out into a bowl and mash… if you feel they’re too stringy, you can certainly pass the mashed pumpkin thru a sieve. But I don’t usually do that… I don’t find it’s necessary. You can certainly do all this steaming and mashing ahead. I did it the night before to use the mashed pumpkin for this recipe and for a pumpkin cheesecake I was making too.
  3. In a small bowl, mix the egg replacer with the water. Stir vigorously or whisk and set aside.
  4. Now we assemble the batter… in a large bowl mix together all the ingredients, including the egg replacer mix. I use my hands to mix well and almost knead the recipe. I tried using a spoon or spatula and it does not work well.

5.  In a frying pan add about 1 inch oil to fry these fritters over medium-high heat… wait until the oil has reached temperature before adding the first one. I usually check if the oil is ready by inserting the back side of a wooden spoon into the oil. If the oil bubbles around it, the oil is ready.

6.  Using 2 spoons create little mounds of batter to fry. My mom likes to spread them a bit once they’re in the pan so they’re not too thick and they fry faster. Once they’re golden brown on one side, flip them over to fry on the other side.

7.  Once they’re cooked and golden brown on both sides, take them out and drain on a plate lined with paper towels.

Puerto Rican Pumpkin Fritters 2

When they’ve cooled off a bit, enjoy one after the other. You’ll see they’re addictive…

Yuca Alcapurrias

6 Aug

When I traveled recently to Paraguay, we wanted to thank all the hospitality our Paraguayan friends showed towards us with a Puerto Rican dinner.  Well… almost Puerto Rican, because we had representation from every member of our group… a little from the Dominican Republic, a little from Brazil, a little that came from inspiration from the Coronel Oviedo market…  But amongst the dishes that were typical to Puerto Rico were our alcapurrias.

With the copious amounts of yucca we had at our disposal in Paraguay, we had to make some sort of fritter with yucca and what’s a better example of a Puerto Rican fritter than an alcapurria. I have tried to share with all of you an alcapurria recipe for a long time now. But, I do not make alcapurrias all by myself at home. Usually, this is a group project and even though they’re not super difficult to make, it goes easier if the tasks are shared.

Alcapurrias are traditionally made with a masa made from ground plantain and yautía. Yuca is also very traditional, so we are not deviating too much from a very traditional recipe here. But instead of filling them with ground meat, we will be using mixed vegetables. You could also use a combination of mixed vegetables and textured vegetable protein to resemble more the ground meat filling. These are amongst the most iconic fritters you can find here in Puerto Rico… present in almost every celebration, especially in patron saint festivities and even at the Luquillo Beach kisokos and Loíza.

This recipe comes from Yazmín and Joel, who were the master alcapurria fryers. My title is more master alcapurria eater. The best thing is to make a bunch of these at one sitting… fry some to eat immediately and any left over, freeze them for later frying. As with any fritter, they’re best eaten immediately after frying or else, they get soggy. They’re so laborious that is not something that you can whip up whenever you get the craving. This takes time… you’re all under advisement.

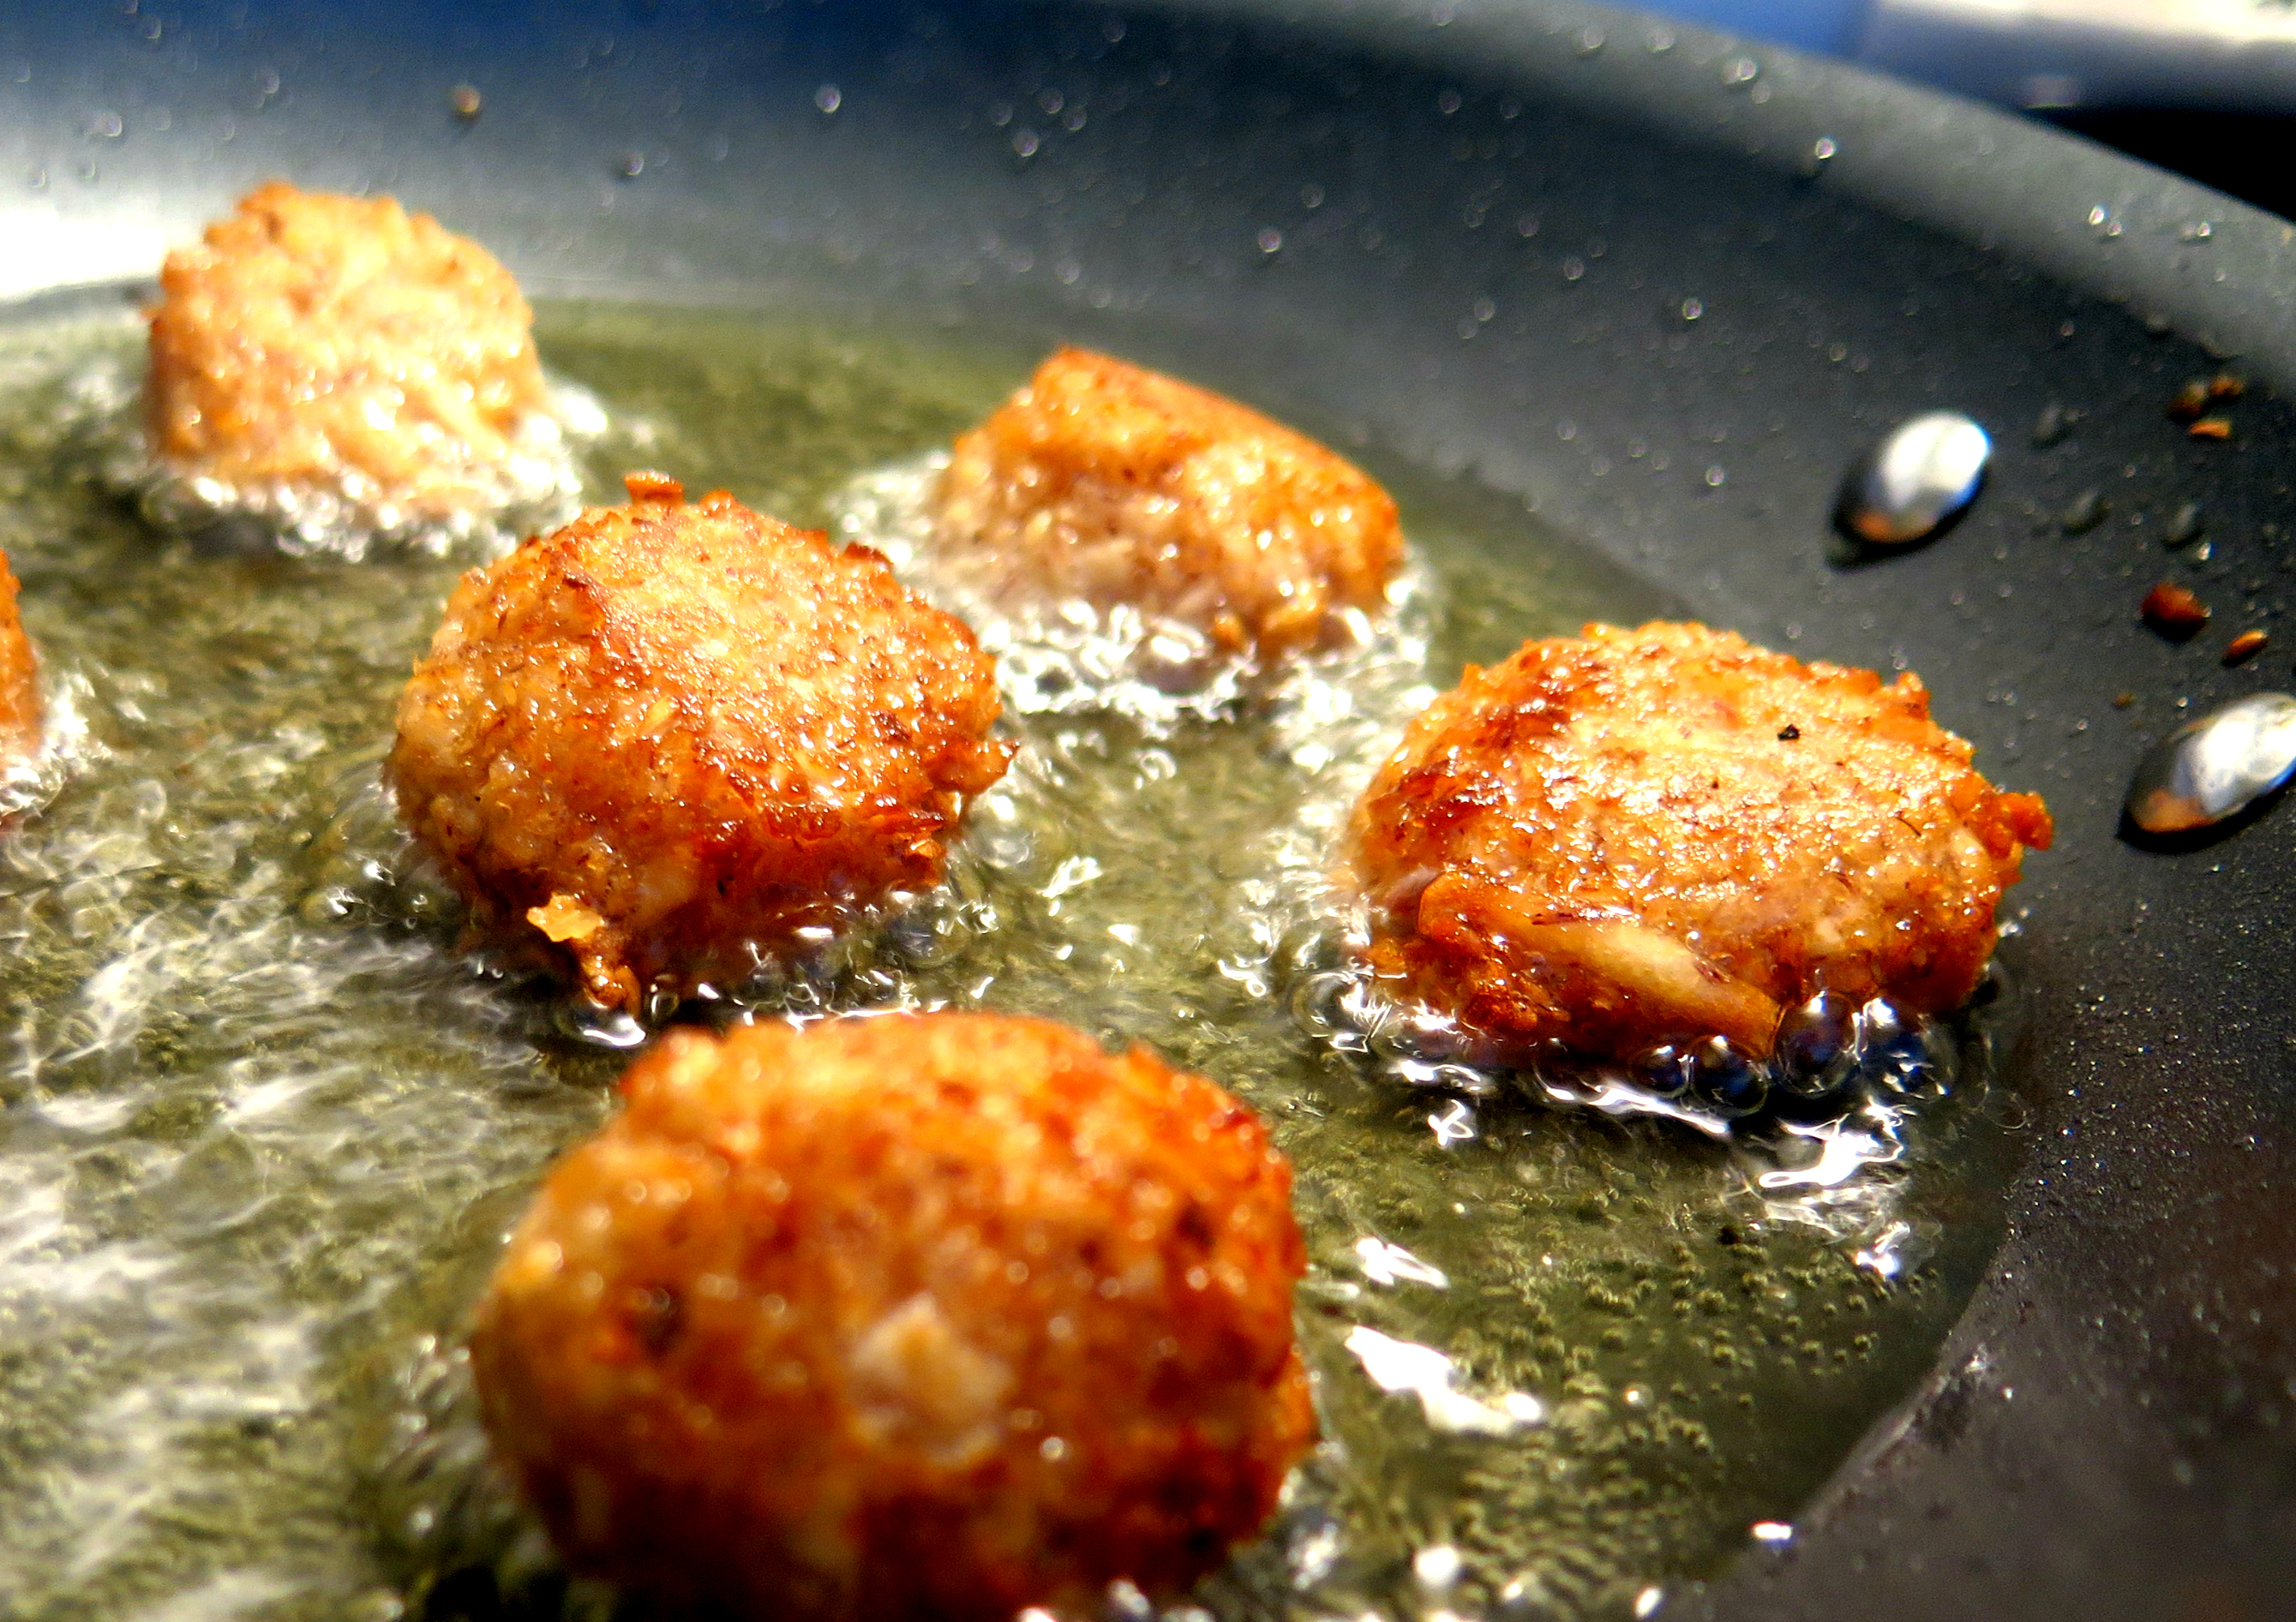
Joel frying some mean alcapurrias in Paraguay

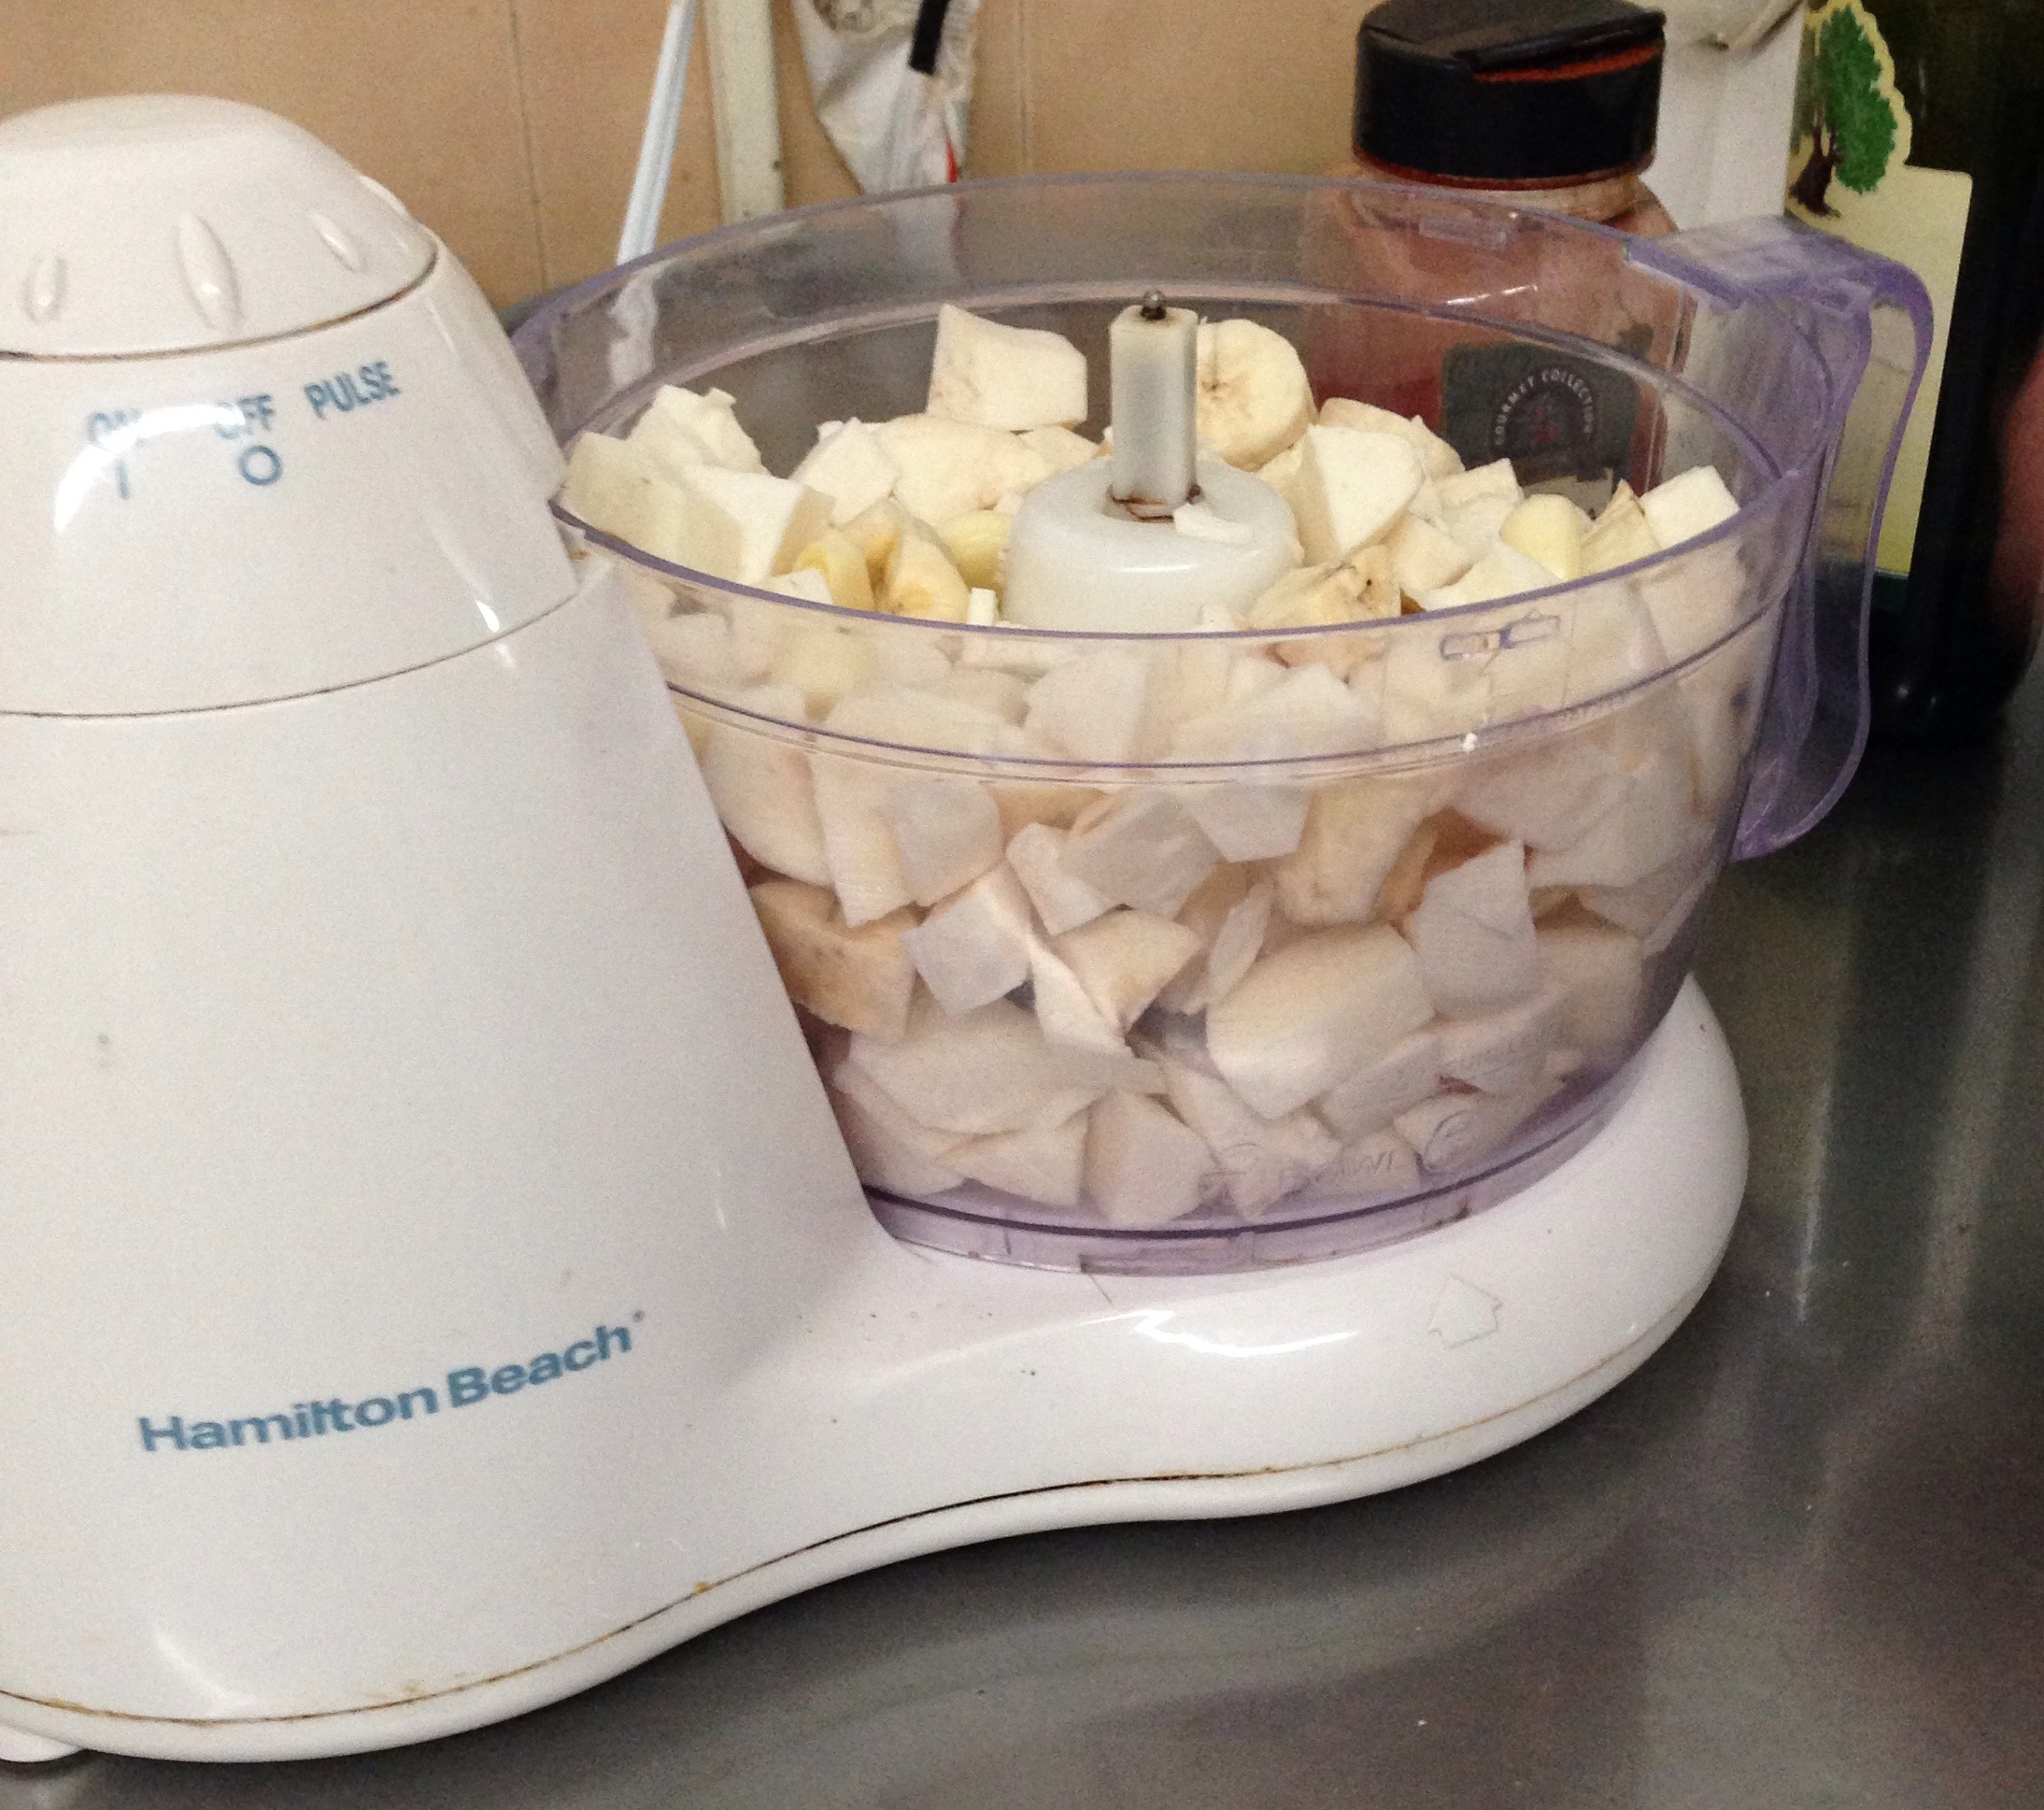
In Paraguay, we were lucky we had a whole team helping with making these alcapurrias, especially to grind the yuca manually. In Puerto Rico, we have the help of a Champion machine where we grind the yuca and the moisture is separated from the dry masa.  But if the task of grinding yuca blows your mind, at the stores they sell frozen masa for alcapurrias or pasteles, ready to go. I’ve never used them, but I believe the only thing you need to do is thaw it completely and squeeze it as dry as possible and season it, just like I teach you here…

YUCA ALCAPURRIAS

Ground raw yuca, about 5 lbs of yuca, pealed and washed well
10 cloves of garlic, mashed in a mortar/pestle or in the food processor
2 ½ tbs salt
¼ cup of annatto oil
 
Mixed Vegetables Filling
1 bag of frozen mixed vegetables, thawed
1 large onion, diced
½ cup of tomato sauce
1 tsp Garlic and Herbs seasoning
Salt and Pepper to taste
Olive Oil
 
Canola Oil for frying
  1.  If you have a manual grinder use that to grind the raw yuca. If you have a Kitchen Aid with the grinder attachment, use that. If you have a Champion machine, use that. If you prefer to purchase the masa frozen from the supermarket, that’s perfect too.

2. After the yuca is ground, you should wring out as much liquid from it as possible with a cotton cloth or towel. The idea is that the masa is as dry as possible. If you skip this step, the alcapurria might fall apart when frying and that’s no fun after you’ve worked so hard to make these.

3. Season the masa with the mashed garlic, salt and annatto oil. Set aside.

4.  To prepare the filling… in a large skillet, add a bit of olive oil and sauté the onions for a while under medium heat until they soften. Season with salt and pepper to taste.

5.  Add the mixed vegetables and the tomato sauce. Mix everything well. Season with salt, pepper, garlic and herbs. Mix once again. Cover the skillet to allow all the veggies to cook well and the flavor meld. Turn the stove off and allow the mixture to cool off a bit before we start assembling the alcapurrias.

6.  In another large skillet, add about 1 ½” of canola oil fro frying the alcapurrias in medium high heat. When the oil is ready, you can check it using the wooden spoon method, we start to prepare and fry the alcapurrias.

7.  With a large kitchen spoon, pour a spoonful of masa onto our other hand that’s covered with either wax paper, aluminium foil or even the traditional banana leaf. Spread the masa with the back of the spoon leaving some thicker borders. Add about 2 tbs of filling in the center of the masa and using the back of the larger spoon again work the thicker masa you left on the edges to cover over the filling. The idea is to surround the filling completely in masa. You might need to practice this a bit, and that’s perfectly OK.

8.  My friend Mai, places the waxpaper on top of a cutting board and folds the paper over so the masa envelops the filling. You almost always finish giving the alcapurria its form with the larger spoon.

9.  Helping yourself with the paper you have the alcapurria in, drop it carefully into the hot oil. Don’t touch it much as the masa is still soft and it can break open. With a spoon you can drizzle some of the hot oil over the alcapurria so the tp part that is not submerged in the hot oil can create a bit of a crust and make it less susceptible to the inadvertent touch of a spoon, etc. It’ll also make it easier to turn over later on.

10.  When the alcapurria is golden on the bottom side, turn it over so it can cook/fry on the other side. The oil should be hot, but not too hot to allow the masa to cook through. If the oil is too hot, it will get hard on the outside but the masa will remain raw. Not good… This is especially important if you’re cooking an alcapurria that has been frozen.

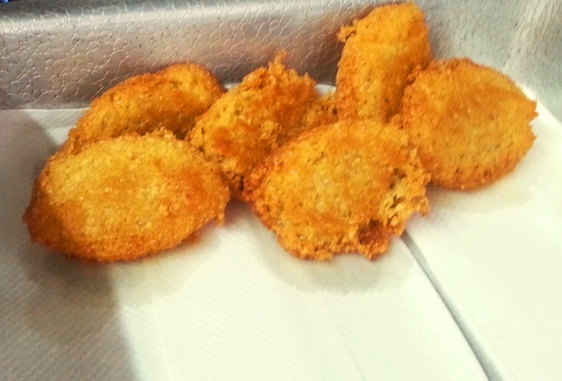
11.  When its golden brown all over, take it out of the oil with a slotted spoon and place it to drain the excess oil on top of paper towels.

12.  You can fry as many alcapurrias you can fit comfortably in your skillet. Don’t try to overcrowd the skillet so they do not fall apart when they’re just put into the oil. Two to three per skillet is the perfect amount. When you get the swing of it, you’ll become like an alcapurria-making machine. Keep on making alcapurrias until you ran out of masa and/or filling.

My mom organizing alcapurrias on some paper towels…

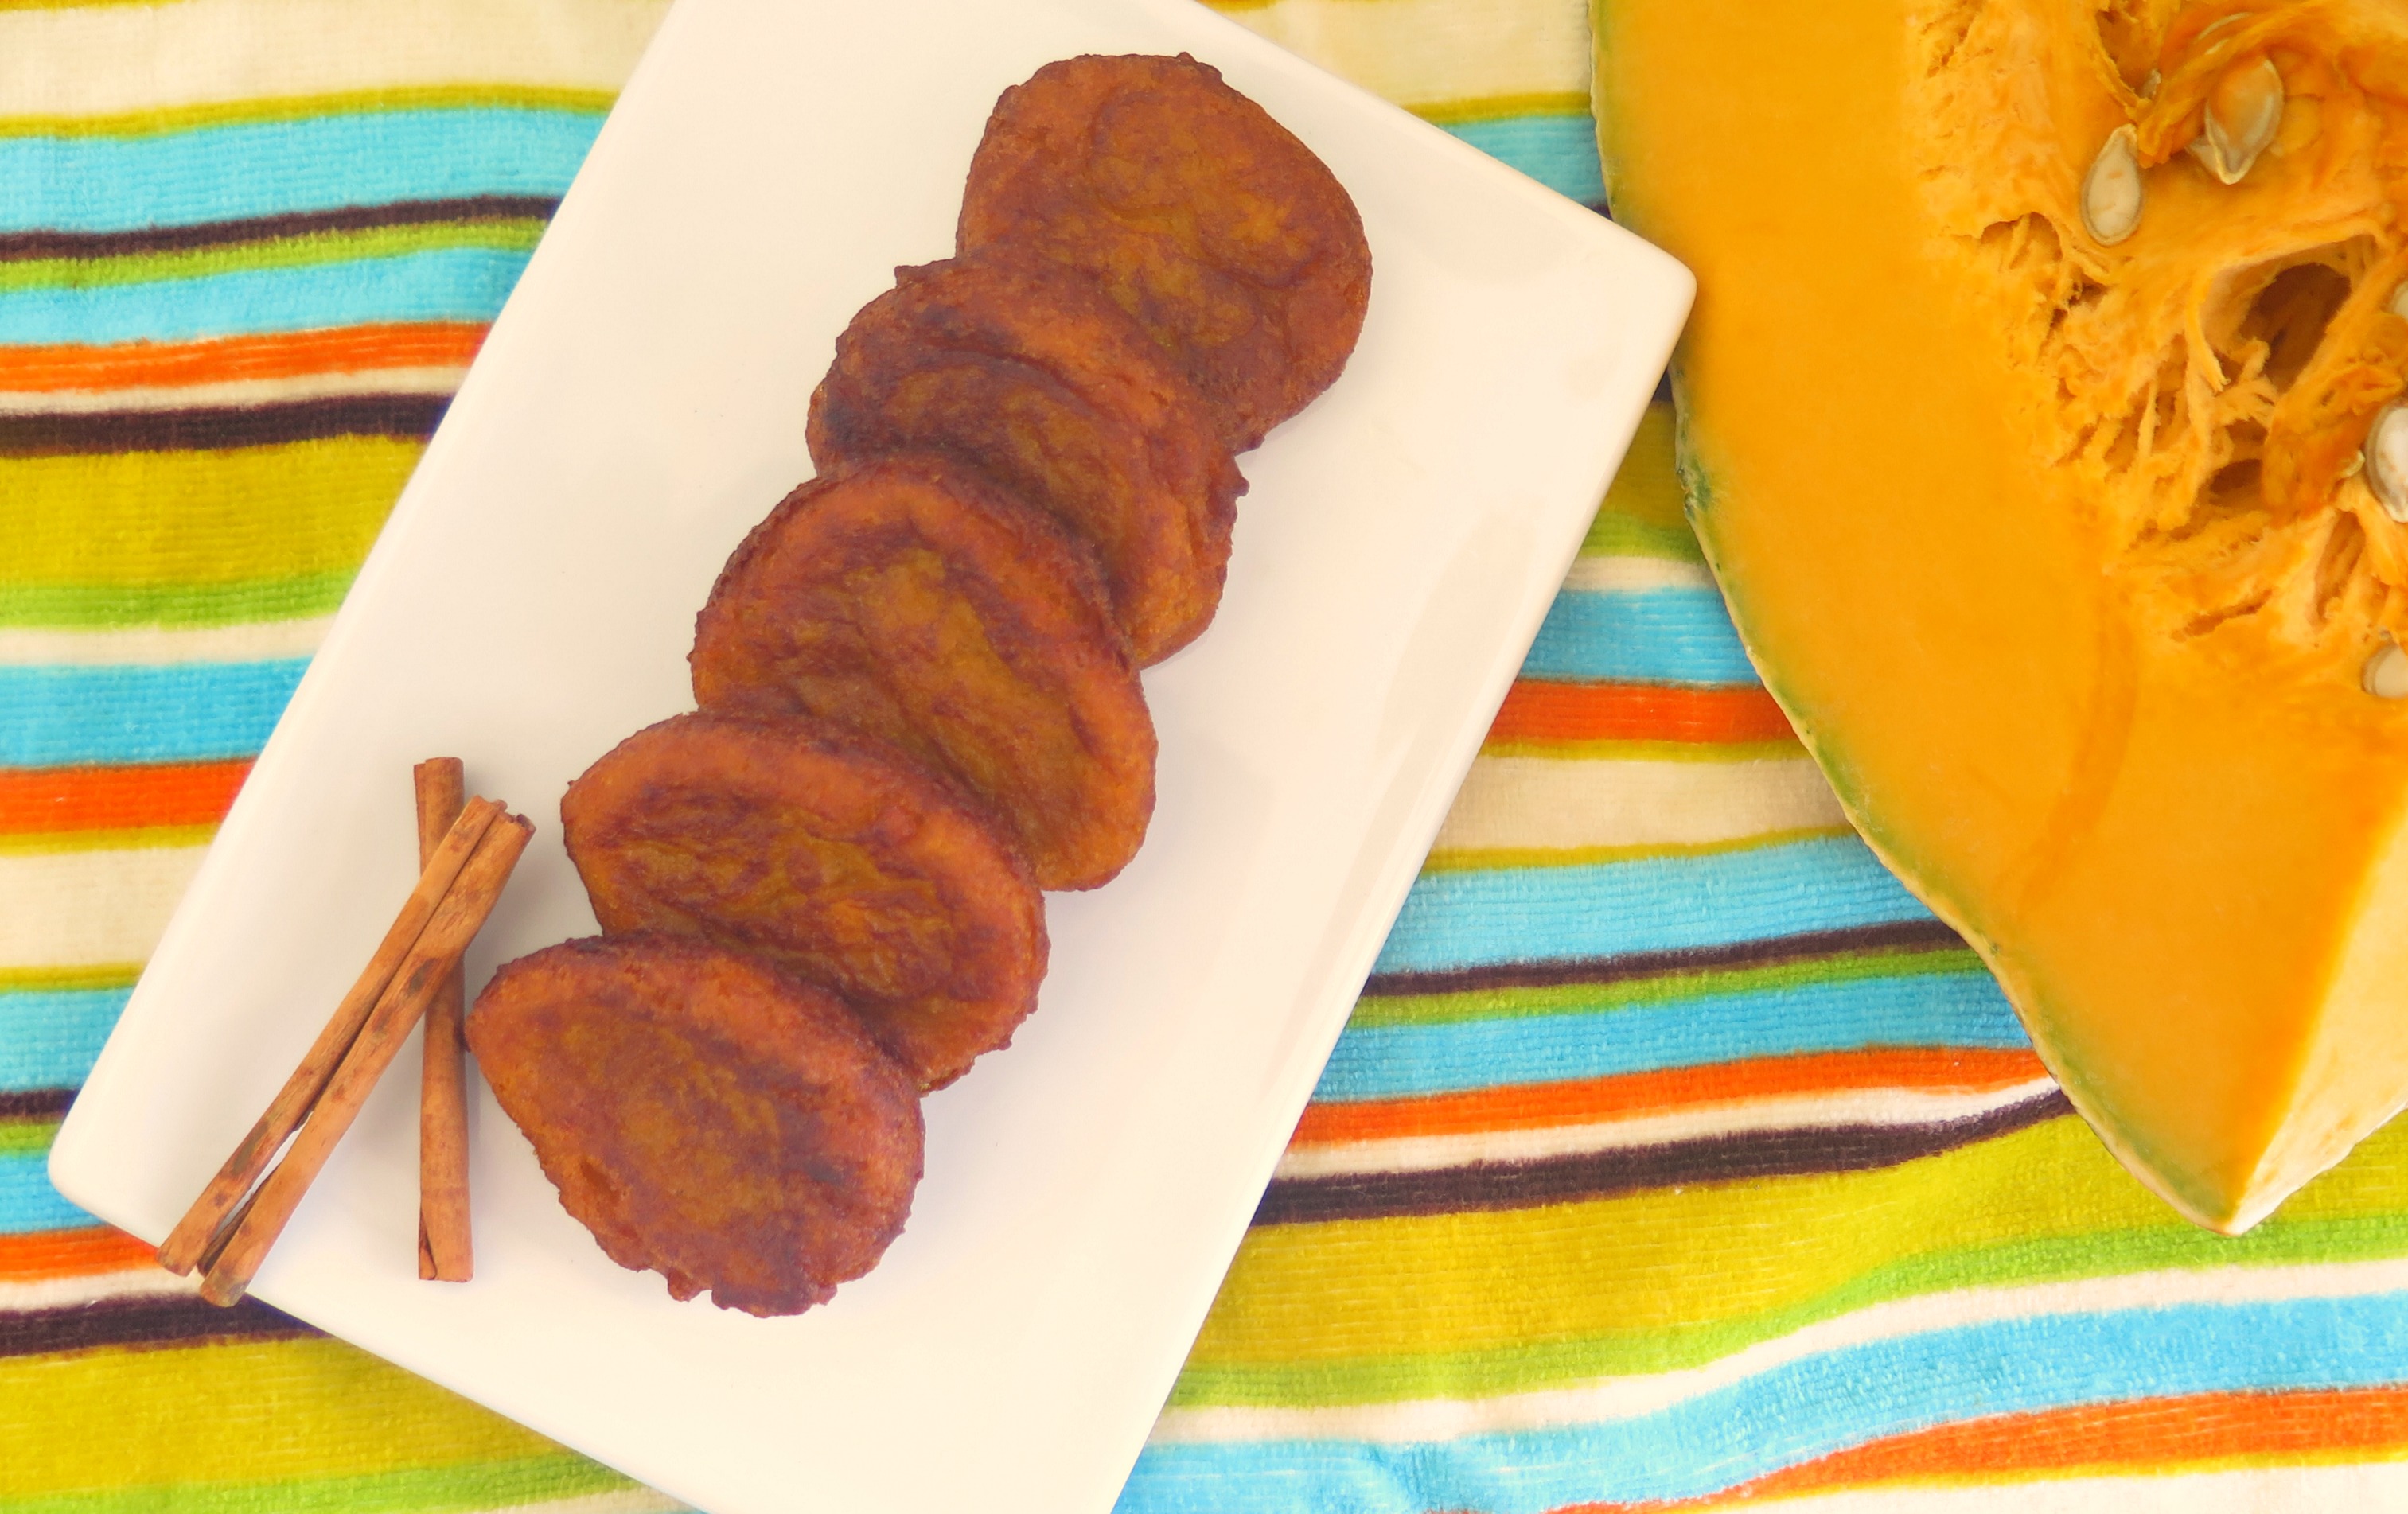
13.  Allow the alcapurrias to cool off for about 15 minutes before digging into them. This is a fried food after all and the insides get very hot and steamy. If you want, you could cut them open in half to allow them to cool off a bit faster.

To freeze the alcapurrias, all you need to do is to cut pieces of waxed paper to separate each alcapurria and place them one next to the other in a resalable zipped plastic bag. This way, when you get the alcapurria craving, you take one out and fry them or bake them in the oven, which turn out pretty good indeed. It’s the same principle as when we make tostones or soy meatballs ahead of time and freeze them.

Frozen alcapurrias stored in a freezer zipper bag

This is how a frozen alcapurria will look like… you can bake in an oven or fry.

I hope you like alcapurrias as much as Puerto Ricans love them. These alcapurrias as vegetarian, but taste just as traditional as any alcapurria made in Luquillo, Loíza, any patron saint festivity or school verbena fair.

%d bloggers like this: