Tag Archives: food

Carob Syrup

2 May

For all you former chocolate lovers who had to put your love aside because of what caffeine does to you… let me introduce you to your new best friend – Carob Syrup.  It does not contain caffeine and it’s as delicious as that good ‘ol Hershey’s syrup of the hey days.

If you loved to decorate  your vanilla ice cream with some syrup … this carob syrup is for you.

If you loved to drizzle your sweet crepes with a little something dark and delicious syrup… this carob syrup is you.

If you had to leave those dark chocolaty milks and shakes in your past… then this carob syrup is definitely for you.

The possibilities are endless… give it a try!!!


Carob Syrup 4


CAROB SYRUP

1 cup carob powder
2/3 cup almond milk
½ cup maple syrup
6 tbs brown sugar
1 tbs vanilla powder


  1. Add all the ingredients into your blender and blend until smooth.


CArob Syrup 1


You can store in your fridge for longer shelf-life.  I store it in a squeeze out bottle so I can pour it over whatever in small drizzles.

Carob Syrup - Spout

Macerated Strawberries

30 Apr

I used these strawberries inside my vegan gluten-free crepes for the latest International Vegetarian Festival we held at the Yoga Center recently.

These are super easy to make… I like to use frozen strawberries or berries of any kind because they tend to be consistently sweet whereas sometimes fresh strawberries can sometimes be very tart.

You can use this as a method to sweeten any frozen or fresh fruits to use in any dessert form. It can also be used as a way to preserve very ripe fruit for future use.

macerated strawberries inside vegan gluten-free crepes


MACERATED STRAWBERRIES

4 cups frozen strawberries, chopped
1 cup turbinado sugar


  1. Place chopped strawberries in a large bowl and add sugar. Mix together so the sugar covers most of the strawberry pieces.
  2. Mix them once in a while to ensure sugar is well dissolved in the juices created by the thawing, fruit juices and sugar. Let the fruits macerate for about 2 hours at room temperature to allow the fruit to thaw completely and for the sugar to infuse into the fruit.

Use immediately after the fruit is macerated or store in an airtight container in the fridge. Use inside crepes, to top ice cream, to top a slice of pound cake or to flavor your favorite morning smoothie.


Vegan Gluten-Free Crepes

28 Apr

A few weeks ago, the Yoga Center celebrated an International Festival of Vegetarian Dishes.  I wanted to contribute by making something that is traditionally considered a “forbidden” food for vegetarians out there, but at the same time that it would be easy for me to make.

I have made crepes time and time again, but out of spelt flour, which is a cousin of wheat.  Most people with wheat-intolerance deal well with spelt, but many people at the Center are avoiding wheat and gluten altogether so if I wanted to make a dish everyone would enjoy, including our Master, I needed to make something gluten-free.

This was my contribution to the Festival…  vegan gluten-free crepes filled with macerated strawberries and decorated with a drizzle of carob syrup.  This was my homage to Didier and the delicious sweet and very popular crepes he would make for me at the Alliance Française a few years ago.


Egg-free crepes

VEGAN GLUTEN-FREE CREPES

1 ½ cups gluten-free flour
4 tbs coconut oil
2 cups almond milk + 6 tbs
½ tsp salt
4 ½ tsp egg-replacer
More coconut oil to cook the crepes to oil the pans


  1. First, prepare the egg-replacer mixture in a small bowl mixing the egg-replacer and 6tbs of almond milk.  Whisk well together and set aside.
  2. In a blender, add the flour, 2 cups almond milk, salt and egg-replacer mix you prepared earlier. Blend well until all ingredients form a smooth batter mixture.
  3. Refrigerate the crepe batter for at least 2 hours.  DO NOT SKIP THIS STEP.  I cannot stress this enough…  if the batter is not rested for at least 2 hours your crepes will be full of bubbles and they will cook uneven.
  4. When you’re ready to use the batter…  move it around and see if it has the consistency of a light pancake batter.  If it’s too thick, add ¼ cup of water or more almond milk to make it thinner.
  5. Heat a small non-stick skillet over medium heat.  Add 1 tbs coconut oil and spread out using a paper towel.
  6. Pour one ladleful of batter into skillet into skillet, turning and tilting skillet as you’re pouring the batter.  The idea is to coat the bottom of the skillet with a thin layer of batter.  Don’t be discouraged if the first few ones are not as you expect.  It took me a few tried to get the right rhythm of ladle and skillet.
  7. Loose the edges of the crepe using an off-set spatula.  You’ll see the crepe bubble a little, very similar to pancakes.  Loosen the crepe delicately from the pan using a silicone spatula.  When you can move the crepe loosely by just shaking the skillet, after about 1 minute of cooking, flip the crepe using the silicone spatula.
  8. Cook on the other side for about 30 more seconds.  Just slide the crepe out of the skillet onto a plate lined with wax paper.
  9. Repeat the process all over until you finish the crepe batter.  Pass the oiled paper towel once in awhile in between crepes, as needed.

In my belief, these crepes were a COMPLETE SUCCESS!!!!  But I will let the people who actually tasted them give their comments and tell you all about them in their own words.  People… I am counting on you!!!!

Vegan Gluten Free Crepes

Natural Remedies – Coconut Oil to soften skin and other beauty purposes

24 Apr

I am a fan of natural remedies. I have not used a Tylenol or any other analgesic to take care of a headache in over 15 years. I have shared already some of the natural remedies I use to treat a cold, coughs, sleepless nights and even nausea.

We were discussing over on FaceBook some of our experiences with natural remedies and my friend Robin shared her new found appreciation for coconut oil. To her, it’s a miracle on a jar.

coconut_oil

I asked her to please share her experience and this is what she wrote for me and you all:

“I’ve used coconut oil in the past, but I’ve never been regular with it. Skin super dry, slather it on, forget about it until the next major emergency. A couple of weeks ago I decided to be regular, vigilant. It goes on my lips instead of lip balm, it gets rubbed in after the shower, still dripping wet, patting, not rubbing skin dry.

Oh my God, it is amazing. I am a 55 year old woman. My skin is as soft and smooth as a 20 year old. I have a patch of psoriasis on my calf. No, I don’t, not anymore. It’s gone, smooth, silky skin in its place. Also, my upper arms were bumpy. Kind of like teeny, tiny pimples, but not pimples. I’ve had them since my early 30’s. Gone.

And this, okay, it’s going to sound weird, but I have allergies. I rub a little of the oil inside my nose. The sneezing is down by half. Apparently, the oil traps the particles. Way less marauders get by to torture me.

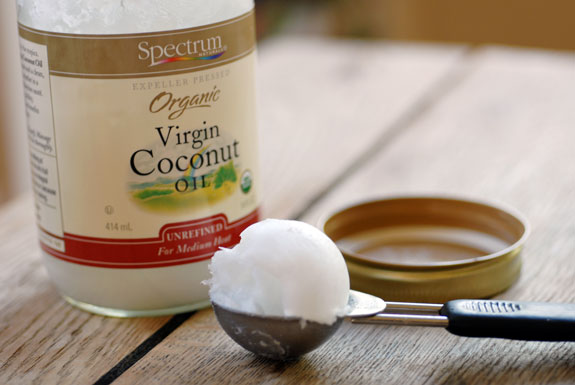
I’m using organic, cold pressed, cooking grade coconut oil. It’s not cheap, but a little goes a long way. I really wish I’d done this earlier. I smell great all the time now. I find myself at work, sniffing my forearms.

I think I shall make a lip balm, using coco butter, coconut oil, and maybe a dash of peppermint (which I understand does not have the drying effects that camphor or menthol). My lips are the only part that haven’t reverted to youth. They’re still dry, but they’re not still crackly. I’m hopeful the oil will have the same effect it did on my skin, just that it will be a slower process. It’s helped a great deal, just not as much as it’s done on my skin, at least this far.

Today, it’s cold and dry out. I rubbed a tiny bit of oil on my palms, rubbed it into my hair. Shiny, not staticky hair resulted. Let me stress – tiny bit. I have thin, fine hair. If I’d used more, it have been weighted down like a helmet. The tiny bit though, it did good things.”

coconut-oil-DSC_1718
After this testimonial, I am giving coconut oil a try too. I was reading on the internet from trusted sources like WebMD, Dr. Oz and Body & Soul Magazine that coconut oil does have a positive anti-oxidant action on the body as it contains Vitamin E, which helps to reduce the effects of oxidation on the body. And even though it’s a saturated fat and should be consumed in moderation, it’s from a vegetable source.

According to Ayurvedic medicine, the higher the fruit/crop grows from the ground, the better it is for us… and coconuts grow real high atop palm trees. So don’t be discouraged to try coconut oil either for cosmetic uses like Robin has or for consumption. I’ve had great experience using coconut water to hydrate myself while training for marathons, to aid in constipation and I have also used coconut oil in cooking. Coconut oil has a high smoking point so it’s great for sautéing and cooking at high temperatures. I have even used it in place of melted butter in a vegan version of my bread budín recipe and a vegan version of crepes. Just be careful, always cut down a bit when using coconut oil to replace melted butter. If a recipe calls for X amount of melted butter, use about ¼ less coconut oil than what the recipe calls for butter. I do not know the logic for it, but it is a rule of thumb that has worked well for me.

I want to thank Robin for candidly sharing her experience with coconut oil with us… and to encourage you to always strive to go as natural as possible. It’s good for your body and spirit.


Raw Yuca Casserole

21 Apr

In Spanish there’s a saying that goes…  “lo prometido es deuda…” meaning that what you promise is a debt you need to repay.  And I promised you ever since our first ever KarmaFree Cooking Class I was going to give you the recipe for the Raw Yuca Casserole or Pastelón de Yuca Cruda and I had failed to do so… until now.

This recipe comes from Mai, Angie’s grandma.  And Mai, may she rest in peace, was who taught us all to make this delicious pastelón.  We were going to perform a tribute to her yesterday at the end of our Easter Retreat, but rain prevented us from it.  So instead, I am honoring her by publishing her recipe for posterity and for all to enjoy.

Mai Clemente

Mai Clemente – Angie’s Grandma

We chose this recipe for our 1st ever cooking class for several reasons: 1) it’s different, 2) it includes typical flavors of Puerto Rico and 3) this is very similar to tasting the flavors of a yuca pastel, very typical during Xmas time, but without the effort of making into individual pasteles.

Don’t get discouraged by the name of the dish…  the cool think about this pastelón, different from other pastelones or other yuca recipes I have shared with you in the past is that you do not need to cook the yuca in advance to make this recipe.  The yuca is prepared raw and then cooked after it’s assembled as a casserole.  Check it out…

First Ever KarmaFree Cooking Class Menu

RAW YUCA CASSEROLE

7 lbs raw yuca
Annato Oil
2 tbs canola oil for sautéing
2 tbs salt, divided
1 can of coconut milk
2 cups of textured soy protein
1 jar of green olives and capers, pitted
2 vegetable bouillon cubes
2 packets of tomato sauce
½ cup of sofrito or recaíto
2 tbs Dry scallions
2 Bay leaves
 
  1. First you need to re-hydrate the textured soy protein in about 2 cups of water. For approximately 30 minutes.  After the soy has plumped, drain it and squeeze it dry well. And keep to the side.
  2. While the soy rehydrates, we prepare the yuca…
  3. Peel the yuca and take off the center hard vein that runs thru it.  Cut it into long pieces that are not too skinny.  Wash it well and grind it using either one of these implements – a Champion grinder, a hand grinder or the grinder attachment on a KitchenAid mixer.  Make sure to squeeze out as much liquid as possible using a large colander or even a clean cotton towel, because this yuca liquid makes the masa bitter.
  4. When the yuca is ground and squeezed dry, season it with the annatto oil, 1 ½ tbs of salt and the coconut milk.  Mix it all well so it has a beautiful yellowy color.  Set aside.
Photo provided by Adriana from GreatFood 360

Photo thanks to Adriana from GreatFood 360

Yuca Cruda, Casserole

Photo thanks to Adriana from Great Food 360.

5.  Now we move on to making the filling…  In a large skillet, add the canola oil and cook all together the olives and capers, sofrito, recaíto, the 2 bouillon cubes, the tomato sauce, dried scallions, bay leaves and ½ tbs of salt.  In the end, add the drained soy and mix everything together.  Allow to cook over low heat for about 10 minutes.  Stir every once in a while to avoid the soy mixture to stick to the bottom of the pan.  Turn off the heat and set aside.

6.  Now we put it all together to make it look like a pastelón…  Divide the yuca mixture in 2 halves.  Spread one half on the bottom of a 9”x 13” baking dish.  You won’t need to pre-grease it because the yuca masa has annatto oil in it.  But you can if you prefer.

Pastelon Yuca 2

Photo thanks to Adriana from GreatFood360

7.  Spread the soy mixture over the first layer of ground yuca as evenly as possible.

8.  Cover the soy mixture with the second half of the ground yuca.

Photo thanks to Adriana from GreatFood360.


9.  Cover the baking dish using a piece of parchment paper secured on top with a layer of aluminum foil.  Bake in a 350F over for approximately 30-45 minutes, depending on your oven.  Start checking the pastelón at the 30 minute mark and uncover it to make sure the consistency is cooked and the top dries and browns a bit.

10.  Let is rest for a few minutes after you take it out of the oven so that the yuca sets and it’s easier to portion and serve into pieces.


This is one of my favorite pastelones.  You can make the filling with anything you would like.  I personally like to substitute part of the soy protein with mixed vegetables.  It’s a way to give variety to the recipe.

I hope you like it as much as Angie and I we like it too… and thanks Mai for leaving us with a little piece of you though your cooking.